Model-driven apps in Microsoft Power Platform offer a robust way to build complex business applications with data-driven user experiences. With the introduction of custom pages, you now have greater flexibility to craft user interfaces that provide more tailored experiences in your model-driven apps. This blog post will guide you through what custom pages are, why they are beneficial, and how to effectively use them in your model-driven apps.
What Are Custom Pages?
Custom pages are an addition to model-driven apps, allowing you to bring a more fluid, canvas-like experience into the model-driven app environment. Unlike traditional model-driven forms and views, custom pages let you design highly customized interfaces using the Power Apps Canvas App editor. This capability opens up a wide range of design and functional possibilities beyond what standard model-driven app components offer.
Why Use Custom Pages in Model-Driven Apps?
Model-driven apps are fantastic for building structured, data-focused applications, but they sometimes lack the flexibility to create truly unique user interfaces. Custom pages address this limitation by allowing you to:
- Enhance User Experience: Create visually appealing, user-friendly pages that can provide a more guided experience for users.
- Extend Functionality: Incorporate custom logic, advanced interactivity, and even integration with other data sources.
- Seamlessly Combine Canvas and Model-Driven App Features: You can use a blend of canvas app capabilities (such as controls, galleries, and forms) within your model-driven app, providing the best of both worlds.
- Embed Within the Navigation: Custom pages can be embedded within the model-driven app navigation, making it easy for users to access custom functionality as part of their workflow.
Examples of Implementing Custom Pages in the Bofor Projects
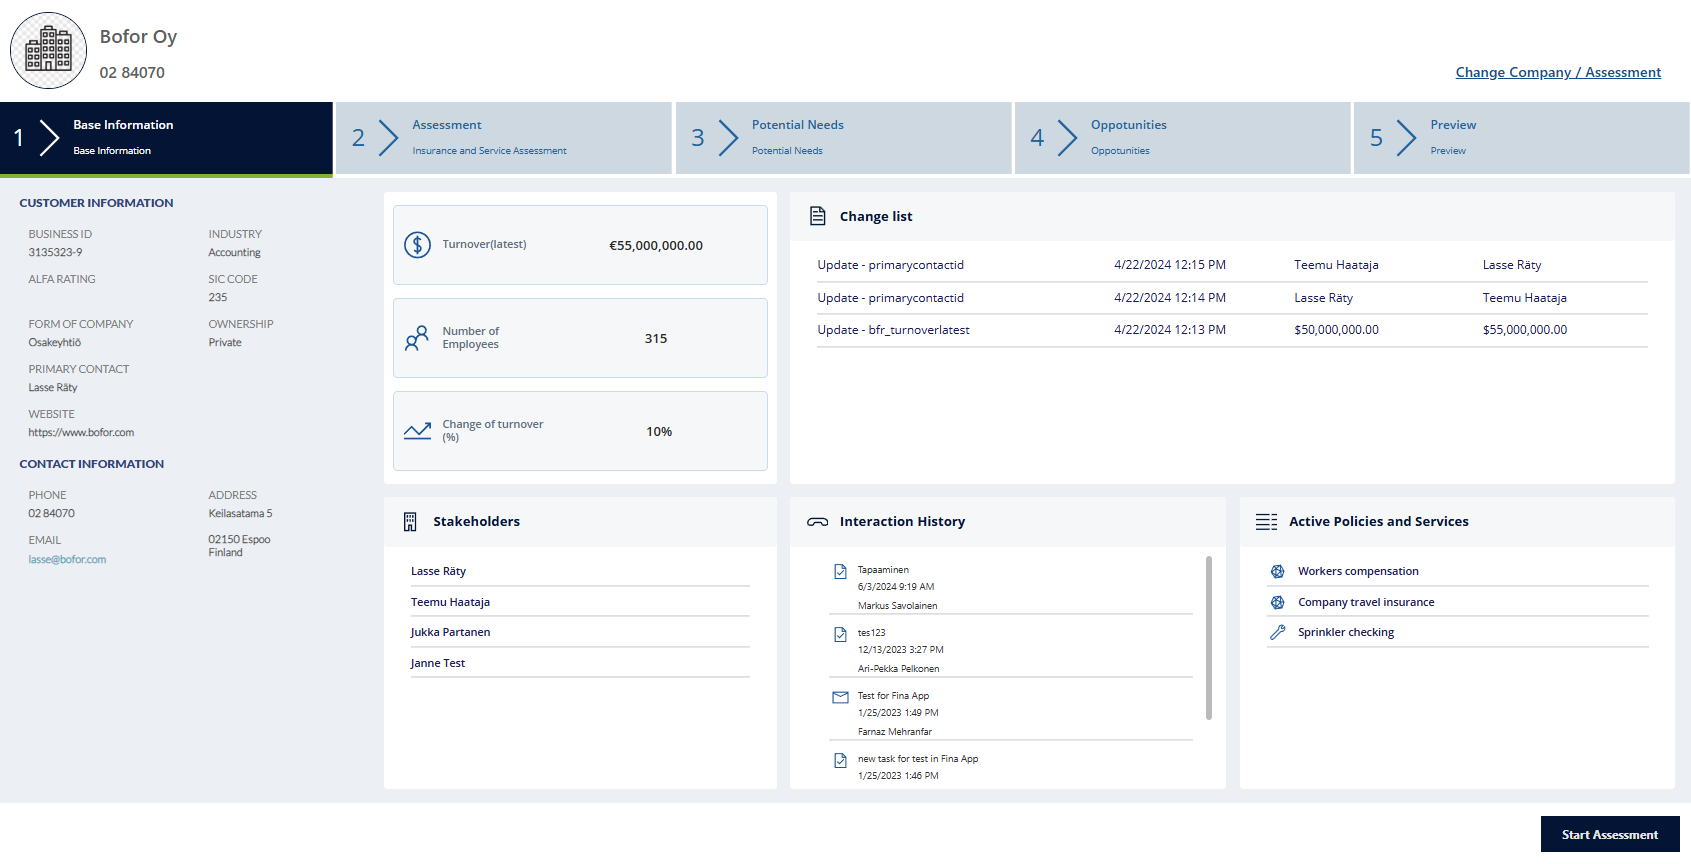
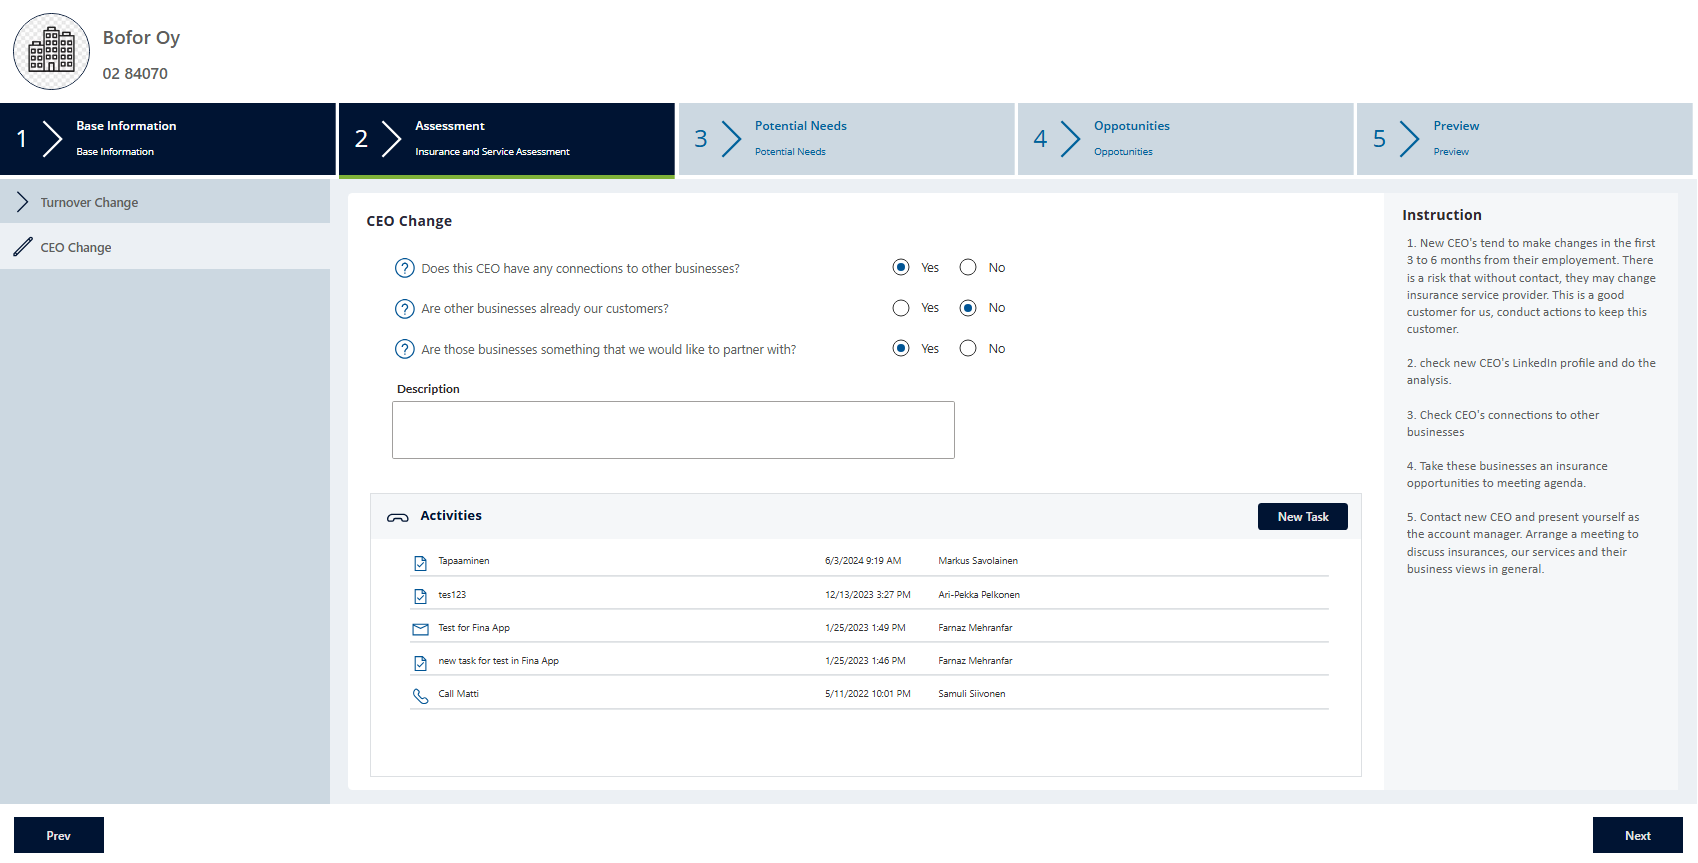
1. Customer Assessment
In this project, Bofor developed a custom page to streamline the customer assessment process. Users begin by reviewing a summary of the customer's information along with their calculated score. They can then proceed with the evaluation, guided by a dynamic questionnaire configured within the CRM. This questionnaire adapts in real time, allowing users to navigate seamlessly through the responses. After completing the assessment, they move to the suggested products section, where they can review recommendations and, if needed, create a sales opportunity in the next step.
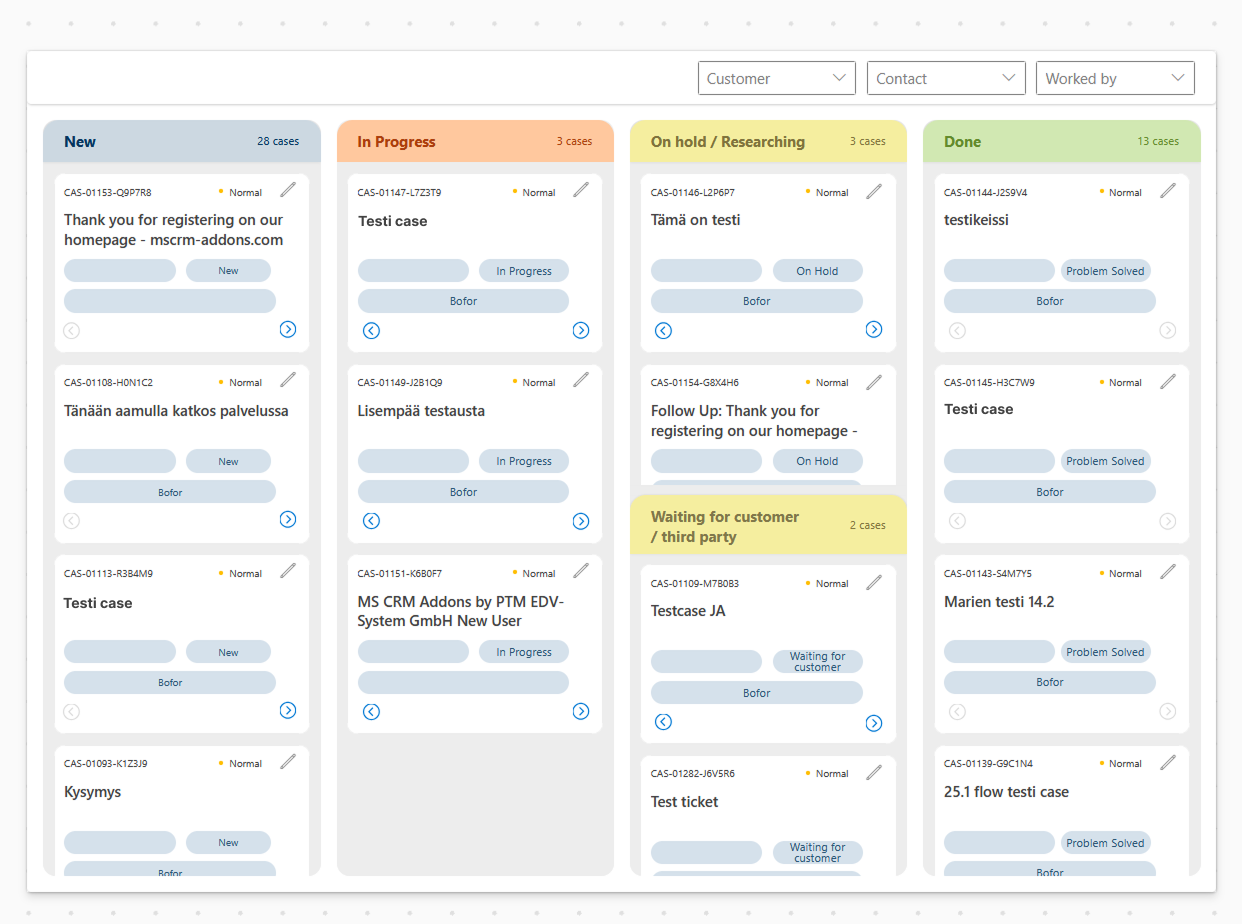
2. RuDe's kanban view
In this project, Bofor developed a custom Kanban page for managing the Run & Development team's cases. Cases can be moved from one column to another using arrow buttons, and users can view and edit specific cases in detail by clicking on the respective card. Filter allows the team to view cases by status at the team level, while also listing cases assigned to specific team members.
How to Use Custom Pages in Model-Driven Apps
Creating a Custom Page
- Navigate to the Power Apps maker portal.
- Select your model-driven app or create a new one.
- In the app designer, go to the Pages section.
- Click on + Add Page, then choose Custom.
- This opens the canvas app editor where you can design your page using various components, including galleries, forms, and custom controls.
Adding Custom Page to Model-Driven Apps
Add the Custom Page to App Navigation
Once you have designed your custom page, add it to your model-driven app's navigation, in this model you don't need to develop any JavaScript:
- In the model-driven app designer, go to the Pages section.
- Choose Site Map, then click on Add to include the custom page in the desired area of the app navigation.
- Assign a label to the page for easy identification in the app’s navigation pane.
Open custom page with "navigateTo"
The navigateTo function is part of the Xrm.Navigation API in model-driven apps. It allows you to programmatically navigate to different components within your app, including custom pages. With navigateTo, you can:
- Open custom pages in a specific target window (e.g., a new window or a dialog).
- Define the size and format of the window.
- Trigger navigation from buttons, events, or even custom scripts.
Let’s break down how to use navigateTo to open a custom page in a model-driven app:
Step1: Identify Your Custom Page
Before you can use navigateTo, you need to have a custom page created in your model-driven app.
Step2: Write the navigateTo Script
Once your custom page is ready, you can create a button or command that triggers navigation to the custom page using navigateTo.
Here’s the basic syntax for navigateTo:
Xrm.Navigation.navigateTo(pageInput, navigationOptions).then(
    function () {
        console.log("Navigation Successful");
    },
    function (error) {
        console.log("Navigation Failed: " + error.message);
    }
);
In this code:
- pageInput defines what page you are navigating to.
- navigationOptions defines how the page should open (e.g., in the same window, a new window, or as a dialog).
Step3: Configure the pageInput
The pageInput object specifies the page type, which in this case will be a custom page. You can pass data to the custom page through the pageInput object by using the recordId and entityName parameters.
- pageType: Specifies the type of page. For custom pages, set this to "custom".
- name: Set this to the unique name of your custom page (as configured in the Power Apps Maker Portal).
- height: Sets the height of the window (used with dialogs).
- entityName: The logical name of the table to be made available in the custom page via Param("entityName").
- recordId: ID of the table record to be made available in the custom page via Param("recordId").
Here's an example of how you can configure it to navigate to your custom page:
var pageInput = {
    pageType: "custom",
    name: "your_custompage_name"  // Replace with your actual custom page name
};
In this example:
- pageType: Use "custom" to indicate you're opening a custom page.
- name: This should be the unique name of your custom page.
Step4: Configure the navigationOptions
The navigationOptions object allows you to control how and where the page opens. Here are the key options you can configure:
- target: Specifies where the page opens.
- 1: Opens the page in the same window.
- 2: Opens the page in a new window.
- width: Sets the width of the window (used with dialogs).
- height: Sets the height of the window (used with dialogs).
Here’s an example of the navigationOptions configured to open the custom page in a dialog box:
var navigationOptions = {
    target: 2,  // Opens in a new window
    width: { value: 70, unit: "%" },  // Sets width to 70% of the window
    height: { value: 70, unit: "%" }  // Sets height to 70% of the window
};
Step5: Attach the Script to a Button or Ribbon Command
Now that your script is ready, you can add it to your app's buttons, ribbons, or other commands. Here’s how:
- Add the Script as a Web Resource:
- In the Power Apps Maker Portal, create a new Web Resource and upload your JavaScript file that contains the navigateTo function.
- Attach the Web Resource to a Button:
- In the Ribbon Workbench or through a form’s command bar, add a new button or customize an existing one.
- Link the button to the web resource containing the navigateTo script.
- Publish and Test: Once the button is linked to the script, save and publish your changes. Test it by clicking the button to see if it navigates to the custom page correctly.
- Example:
Here’s the complete JavaScript code for opening a custom page in a new window, can be used on ribbon button or form event:
function openCustomPage() {
    var pageInput = {
        pageType: "custom",
        name: "customPageName"  // Replace with your custom page's name
    };

    var navigationOptions = {
        target: 2,  // Opens in a new window
        height: { value: 70, unit: "%" },  // 70% height of the screen
        width: { value: 70, unit: "%" }    // 70% width of the screen
    };

    Xrm.Navigation.navigateTo(pageInput, navigationOptions).then(
        function () {
            console.log("Navigation Successful");
        },
        function (error) {
            console.log("Navigation Failed: " + error.message);
        }
    );
}