
- Category: Power Automate and Logic Apps tutorial
- Audience: Citizen developers, functional consultants, low-code developers
- Difficulty level: 2/5 (some experience with both Power Automate and Dataverse required)
Using Dataverse triggers and actions in Power Automate or Logic Apps can baffle beginners. There’s quite a few rules and tricks you have to remember in order for the process to go smoothly. In this blog post, we get to know some of the tricks and most useful Dataverse actions in Power Automate. You should already have some experience with Power Automate and understand how Dataverse works in order to be able to follow. You can use this tutorial as a checklist next time you work with Dataverse from Power Automate – just in case you sometimes forget how to set a value to that lookup column as well 😊
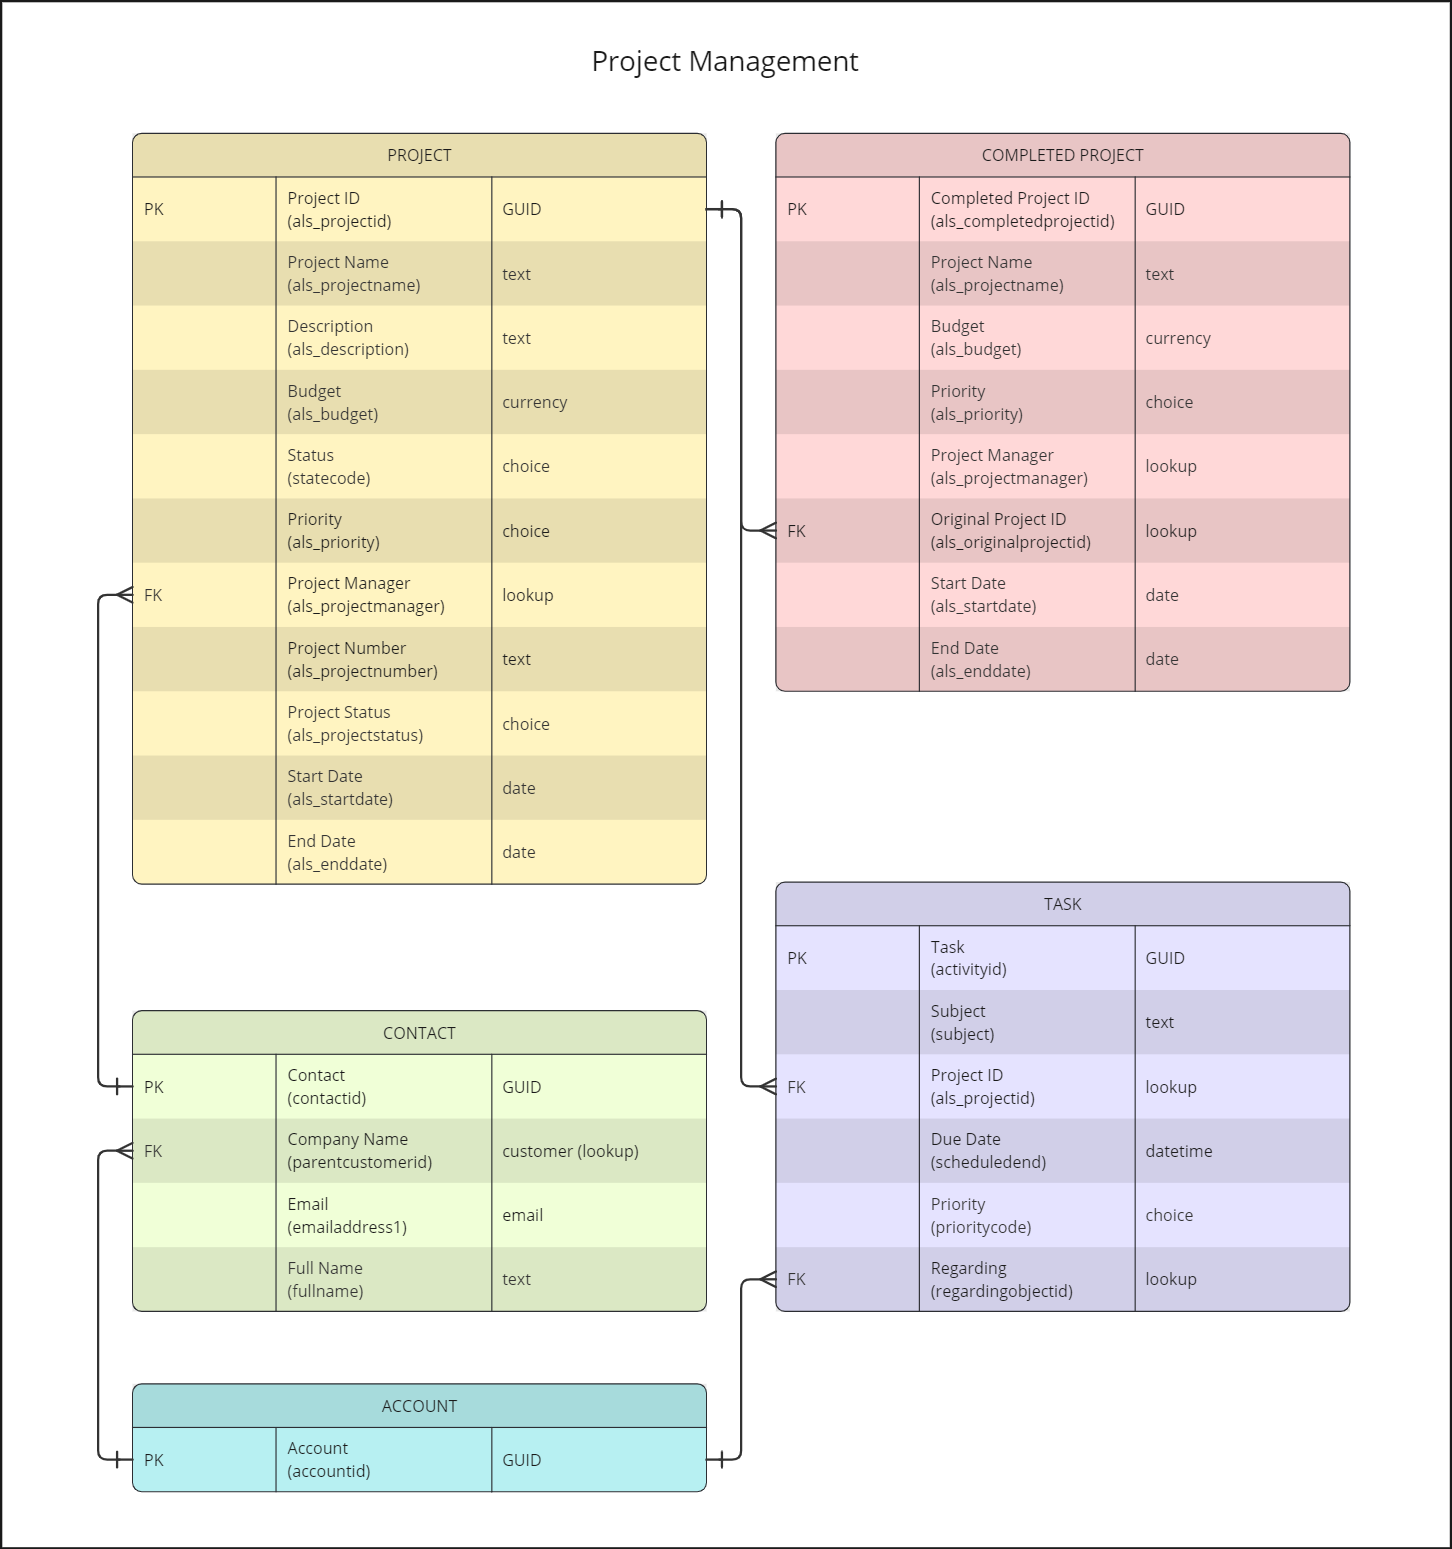
In this tutorial, I will reference several tables and columns in Dataverse. Below I have included a simplified data model that you can refer to throughout the text, if necessary. I have included the column names and logical names as well as the data types on the right. PK refers to primary key and FK to foreign key.
When a row is added, modified, or deleted
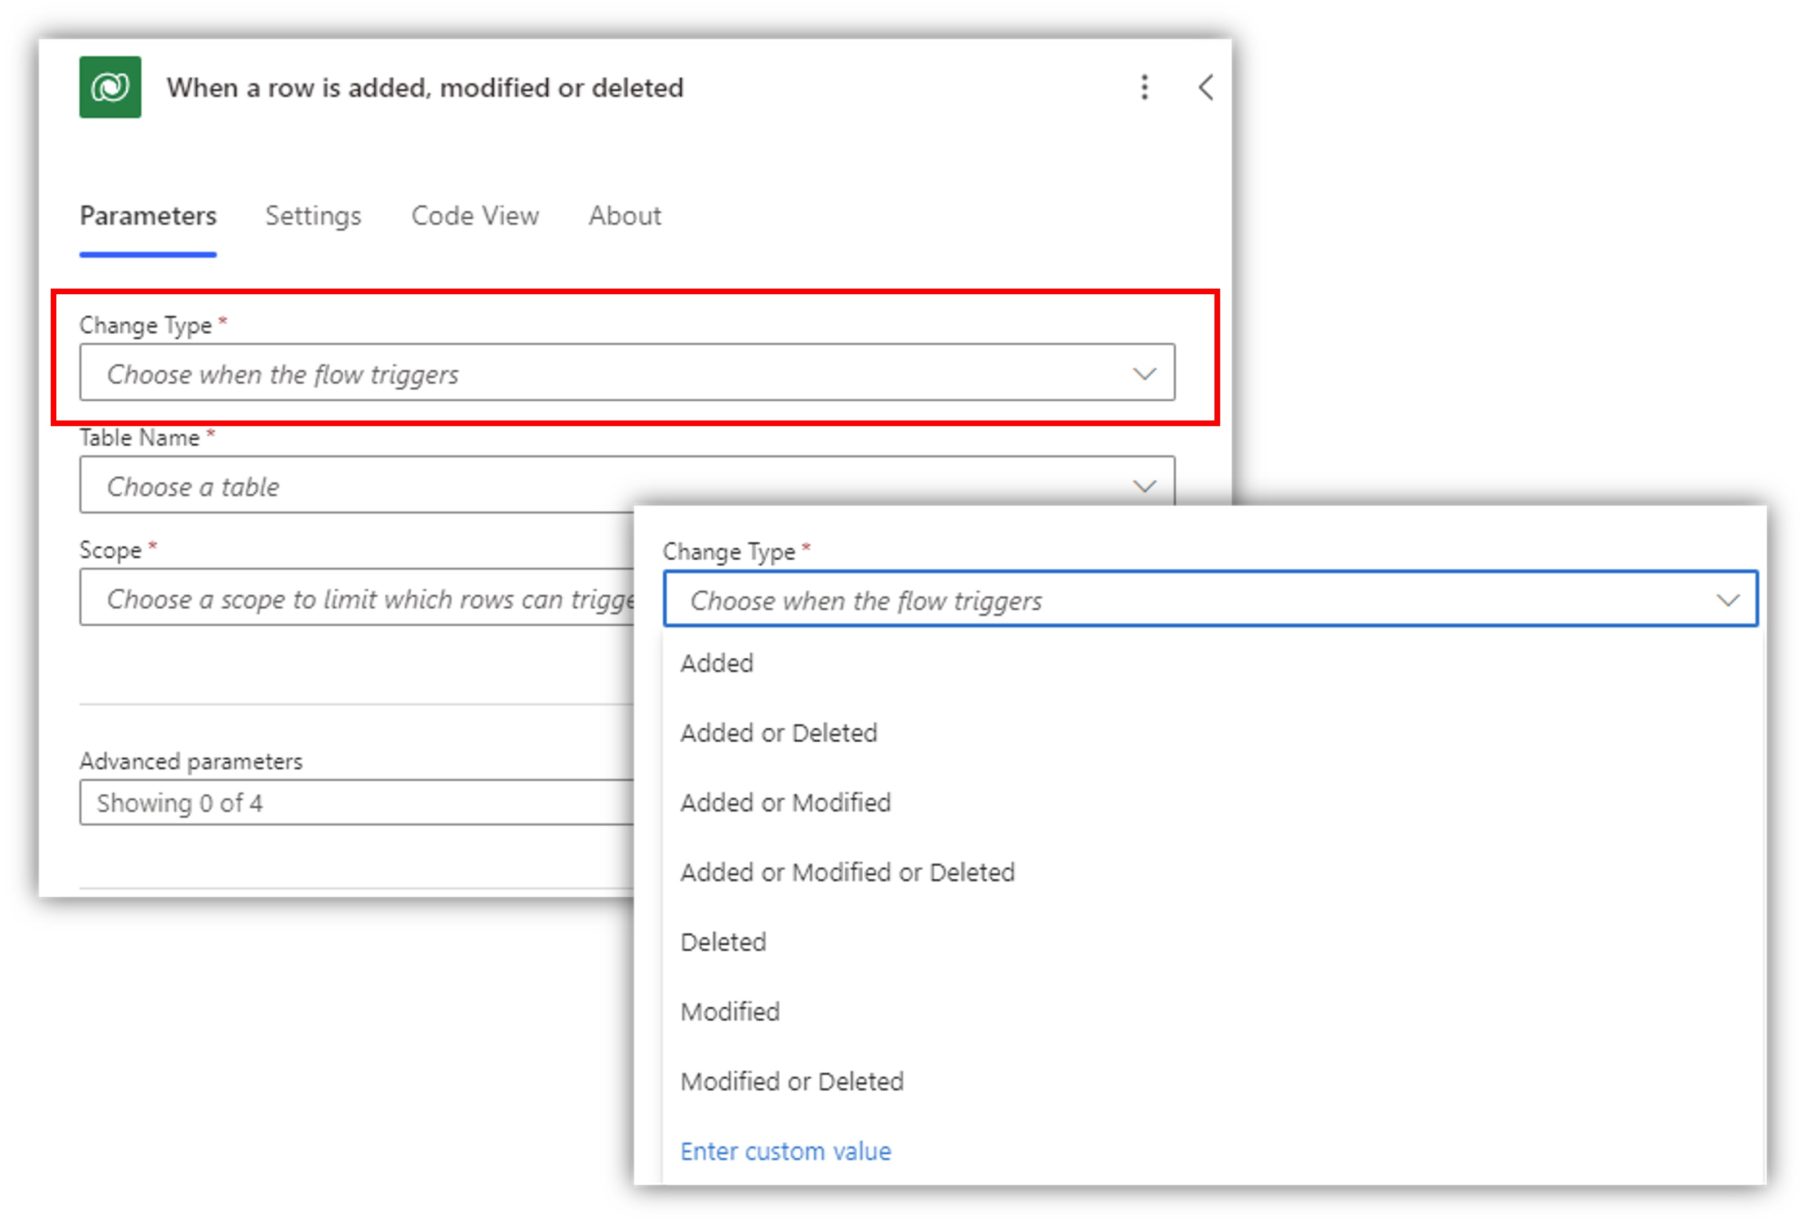
The most common Dataverse trigger is When a row is added, modified, or deleted. Normally you wouldn’t want to trigger your flow on all of these occasions. You select which type(s) trigger your flow by modifying the change type.
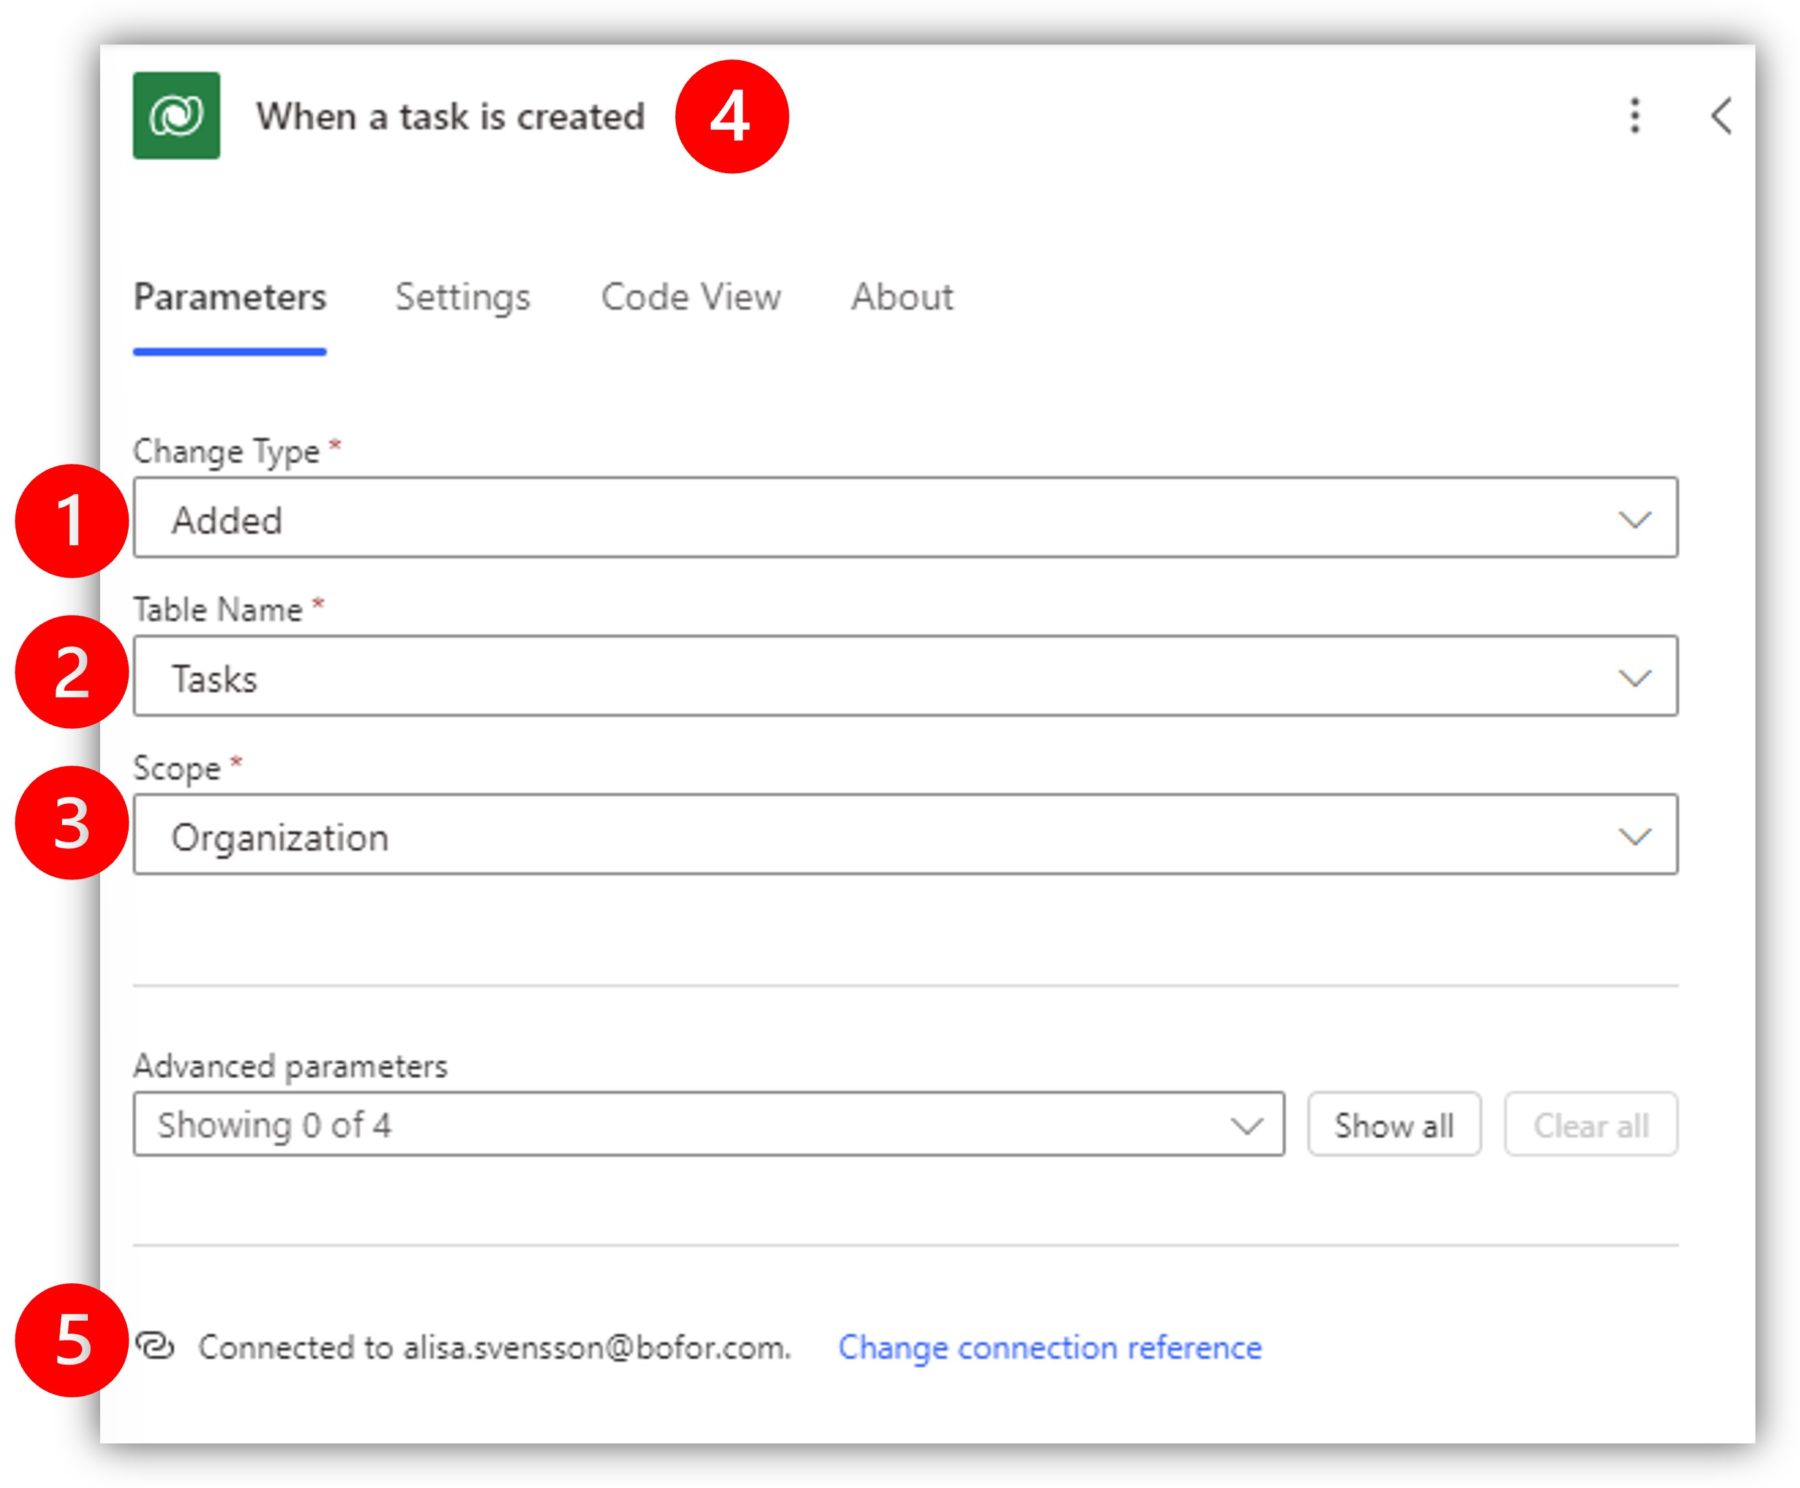
In the first example, we are creating a flow that sends an email when a new task is created. I have selected added as the change type (1) and Tasks as the table (2). For the final required parameter, scope, I have selected organization (3). The flow is triggered when anyone in my organization adds a new task. Note that I have also renamed the trigger to reflect the actual functionality (4).
We will not dive deeper into Dataverse security concepts today, but as an example, if you selected user for the scope instead of organization, the flow would be triggered only when the connected user creates a new task. If you logged in with your normal Microsoft 365 account when creating the flow, your connection reference is being used and the flow triggers when you create a new record. In the modern designer, you can see the connection information right under the trigger parameters (5).
When a row is added - Filter Rows
Once you have filled in the required parameters, use filter rows to limit when the flow is triggered. Select show all to view advanced parameters and enter an OData filter for the filter rows parameter.
Let’s say that I only want to receive an email notification when a task of high priority is created. There is a choice column called Priority in the Tasks table. To write the filter expression, I need to know both the logical name of the column and the numerical value of the choice. In Dataverse, select the column in the table and expand Advanced options to view the logical name.
The choice values are visible above the advanced options for local choices. For global choices, you have to select Edit choice to be able to see the labels and values.

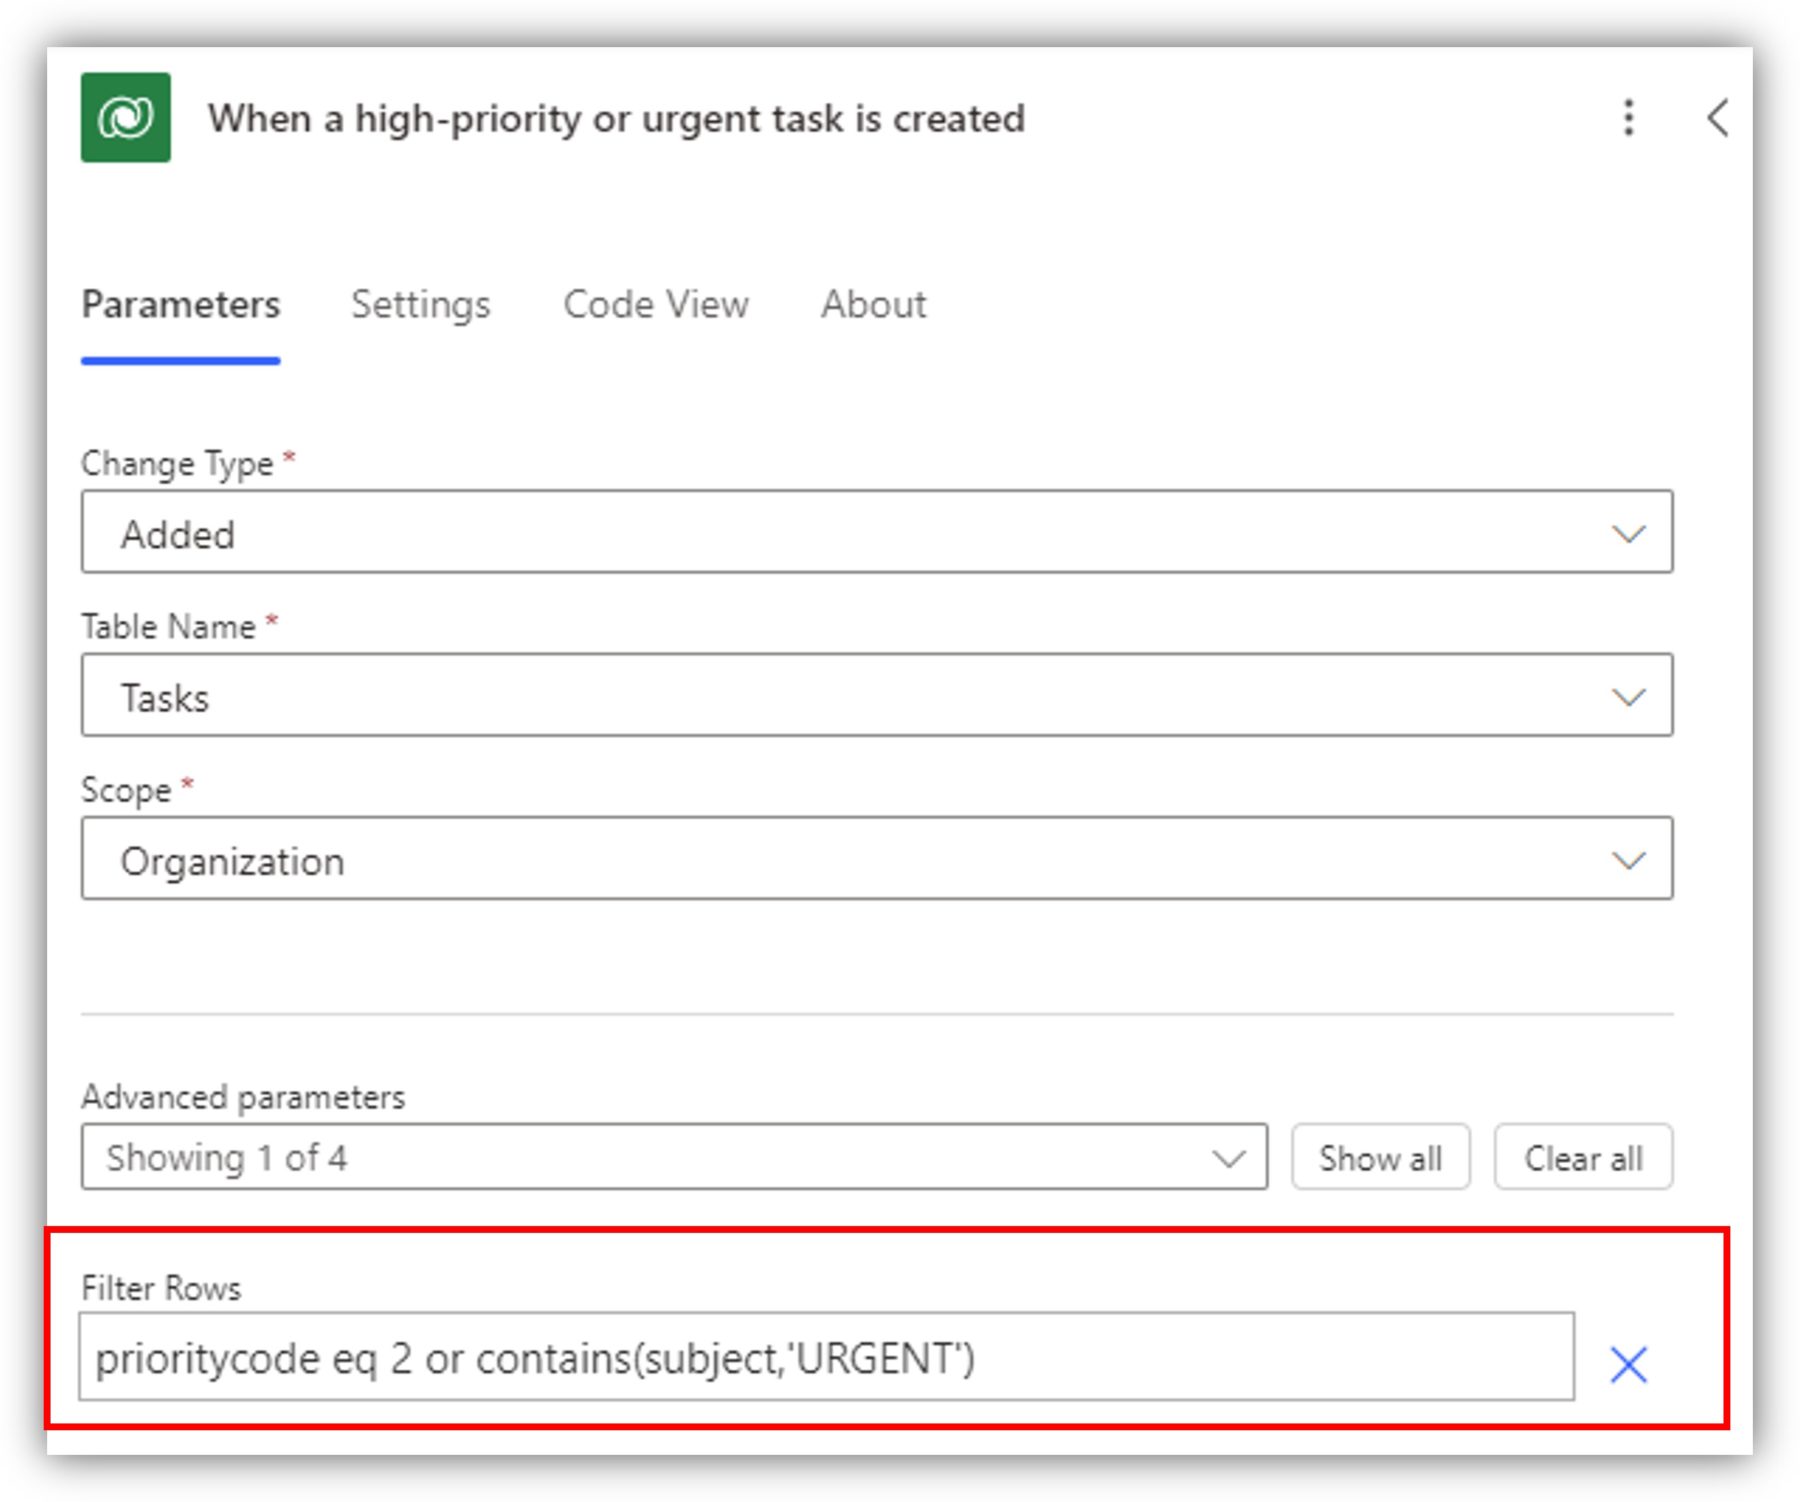
The numerical value of High is 2, so the filter expression is as follows: prioritycode eq 2. You can extend the expression as well. Let’s say you want the flow to be triggered if the task is of high priority OR if the subject field contains the word URGENT in all capital letters. The expression is prioritycode eq 2 or contains(subject,'URGENT').
If you are unfamiliar with OData filters, don’t worry. You can easily find examples online and sources like ChatGPT or Copilot are very helpful. The FetchXML Builder in XrmToolBox is also great for building both OData and Fetch XML queries (more about Fetch XML later).
Sometimes there is a need to trigger a flow only if a certain field has a value. For basic fields it’s quite intuitive. The following checks that the task has a due date: scheduledend ne null (the logical name of due date in the standard table Tasks is scheduledend and ne stands for not equals).
But if you want to check a lookup column value the syntax is different. You have to add an underscore as a prefix to the logical name and ‘_value’ as suffix – this forms a reference to the GUID of the record in the related table. In the following example the flow is triggered only if the column Regarding has a value. Regarding is a lookup to Account.

You can also use Power Automate expressions in the filter. The following filter ensures that only tasks whose due date is in the future trigger the flow – the due date is “greater than” the current date:

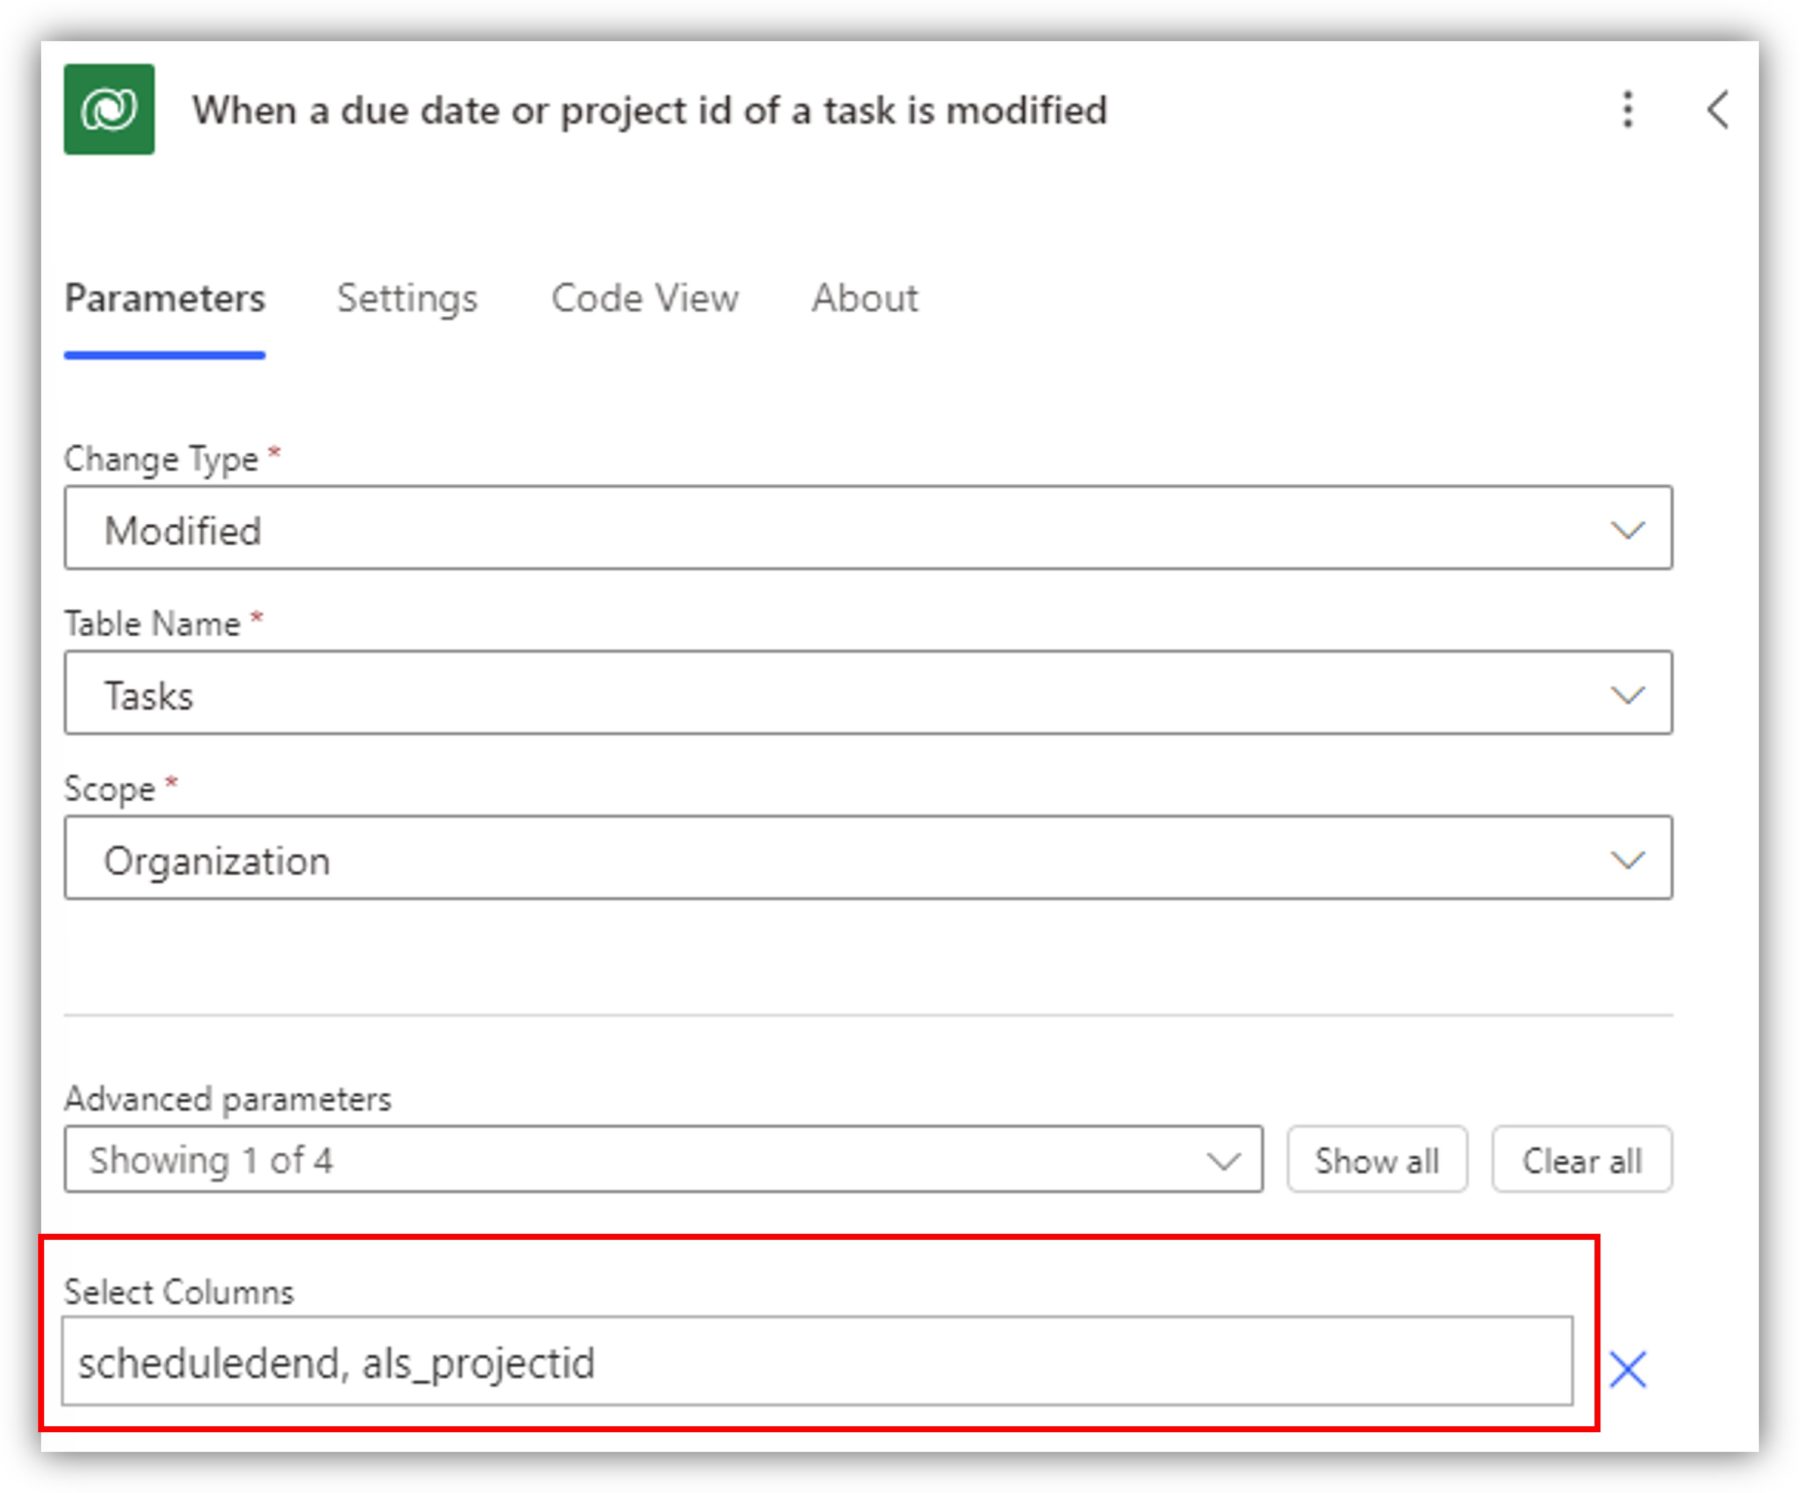
When a row is modified - Select Columns
Let’s move on to a different example. I have changed the trigger type to Modified. In this case, the select columns parameter becomes useful and in fact it is not even available for the change type Added, even though it’s visible. In this field, you can simply list out all the logical names of the columns you want to trigger the flow. The flow is triggered only if one of them is modified. In the following example, the flow is triggered if the due date or project ID columns are modified. Project ID is a lookup column – note that you can use the logical name here.
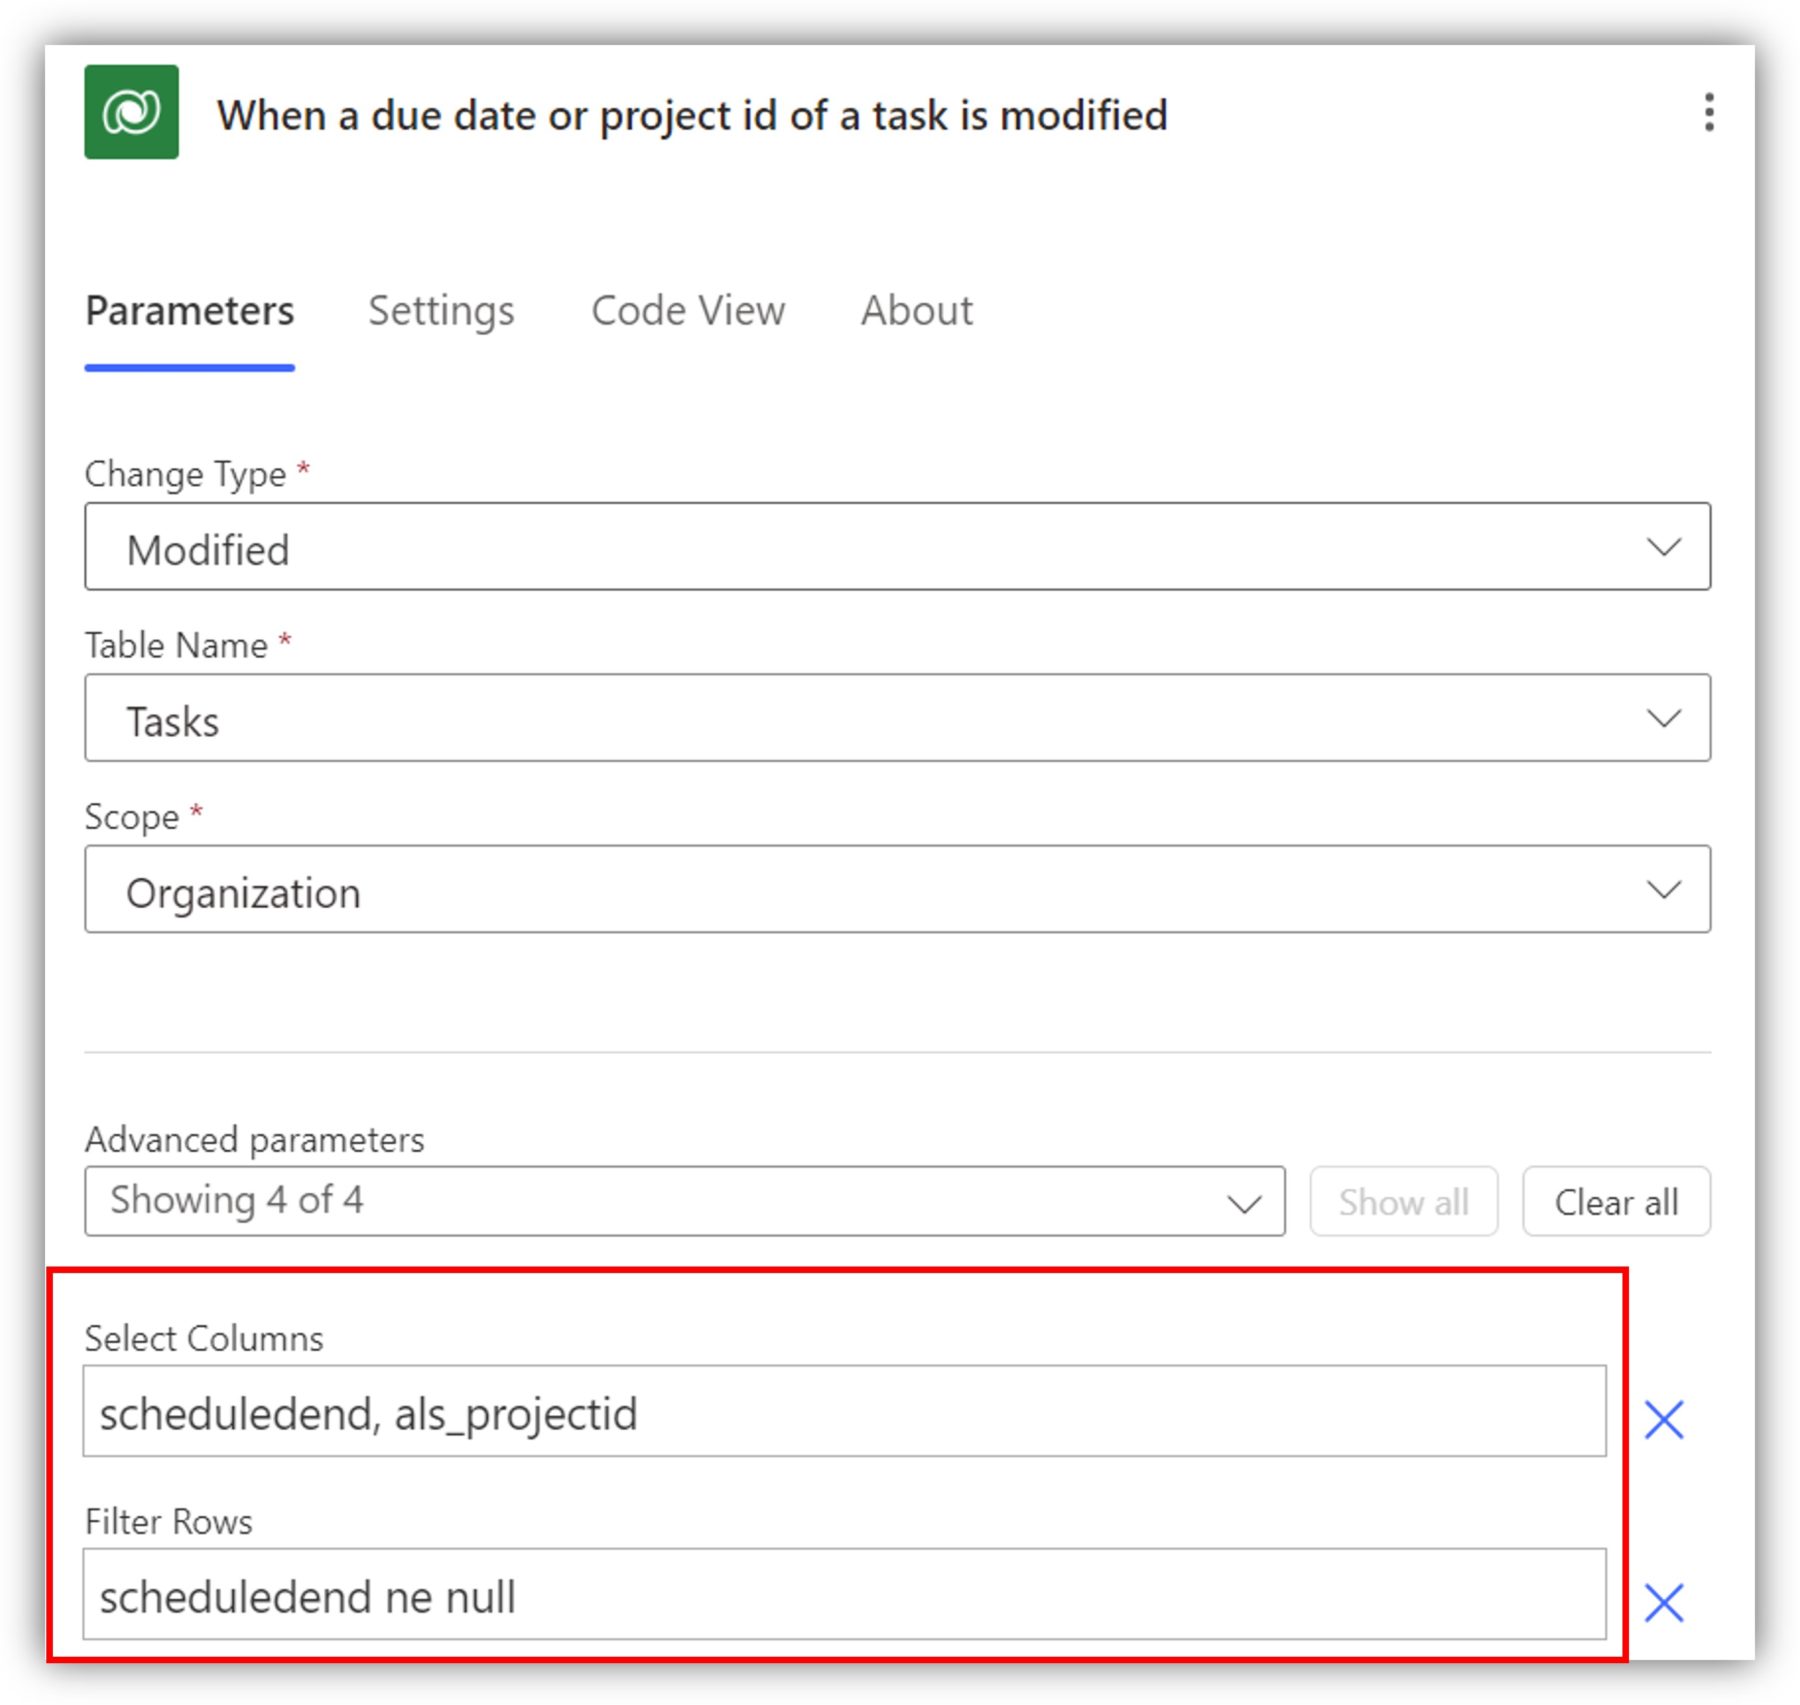
You can also use a combination of select columns and filter rows. The following triggers the flow if either the due date or project ID columns are modified but only if due date is not empty:
One final tip on the trigger parameters. For the delay until parameter you can enter a datetime value. You can build an expression or simply enter a logical name of a datetime column. If you enter scheduledend there, your flow is triggered on the due date of the task.
Utilizing these trigger parameters, you can build powerful filters that eliminate the need for unnecessary conditions and only triggers your flow when necessary. Let’s move on to some of my favorite Dataverse actions next.
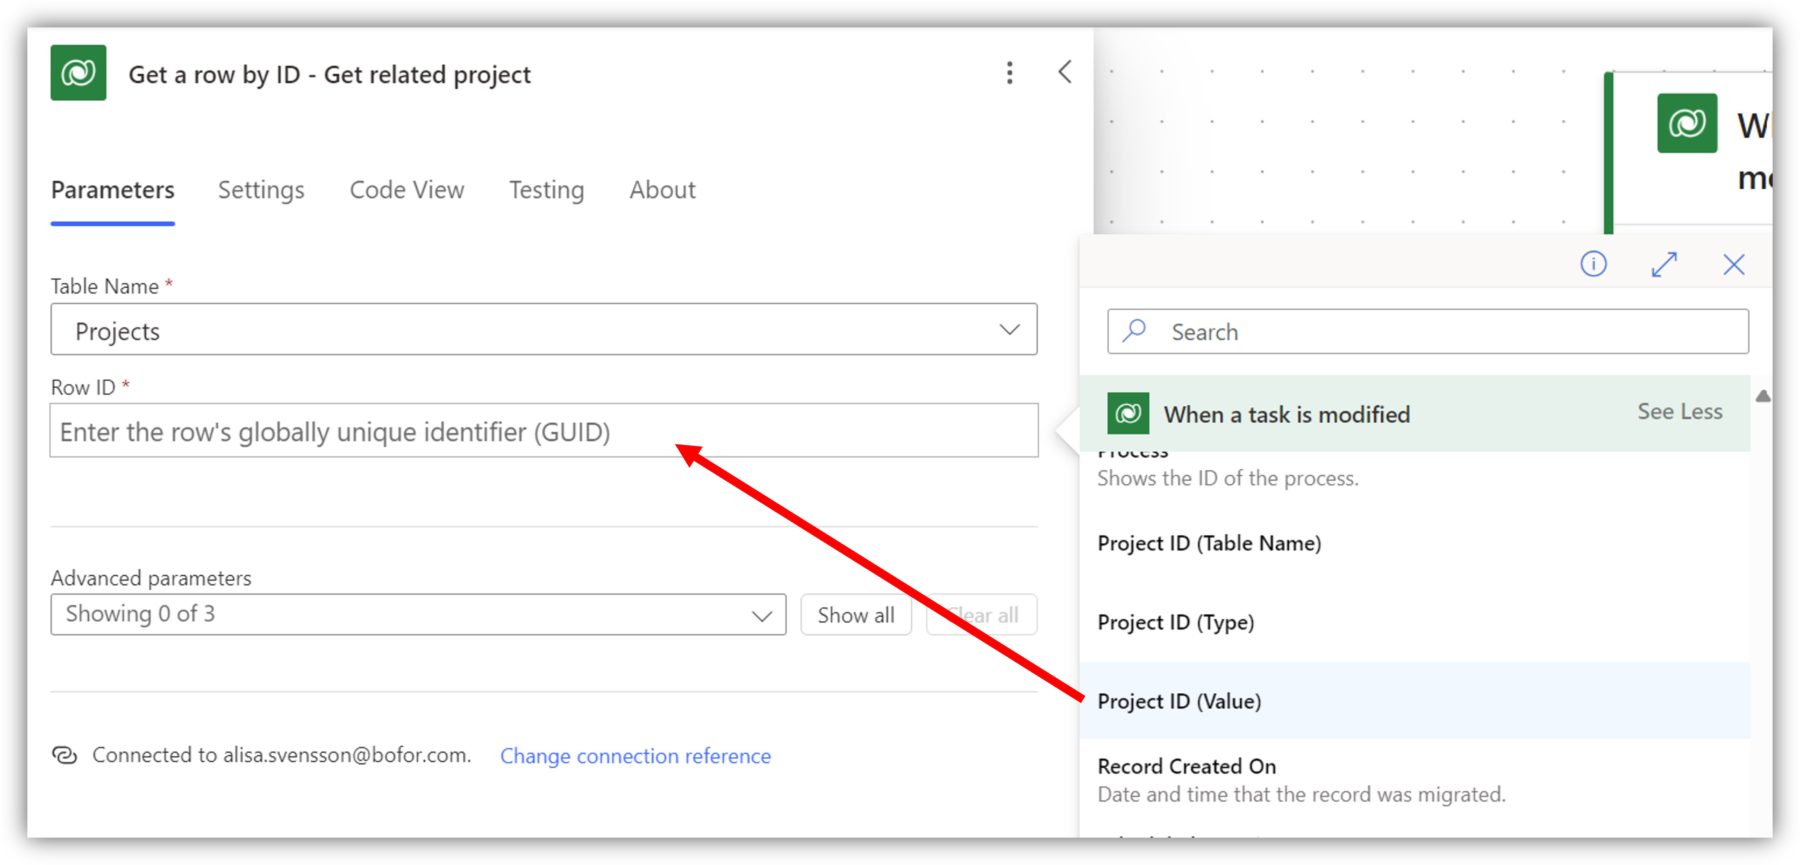
Get row by ID
With the Get row by ID action you can search for more information on a record based with the GUID (= ID). A common scenario is when you are using the trigger we discussed above and then you want to use some data from a related table. In the following example, I am accessing project data based on the project ID, a lookup in Tasks. I have selected the Projects table as the table name and then selected Project ID (Value) from the dynamic content as the ID. This refers to the GUID of the project in the related table and corresponds to the format _als_projectid_value.
Now we have access to all the data of the related project in the dynamic content.
Get row by ID - Select Columns
But do you really need all of that information? Most likely not, and here we make use of the select columns parameter again. In the advanced parameters of Get row by ID, you can list out the logical names of all the columns you are interested in.
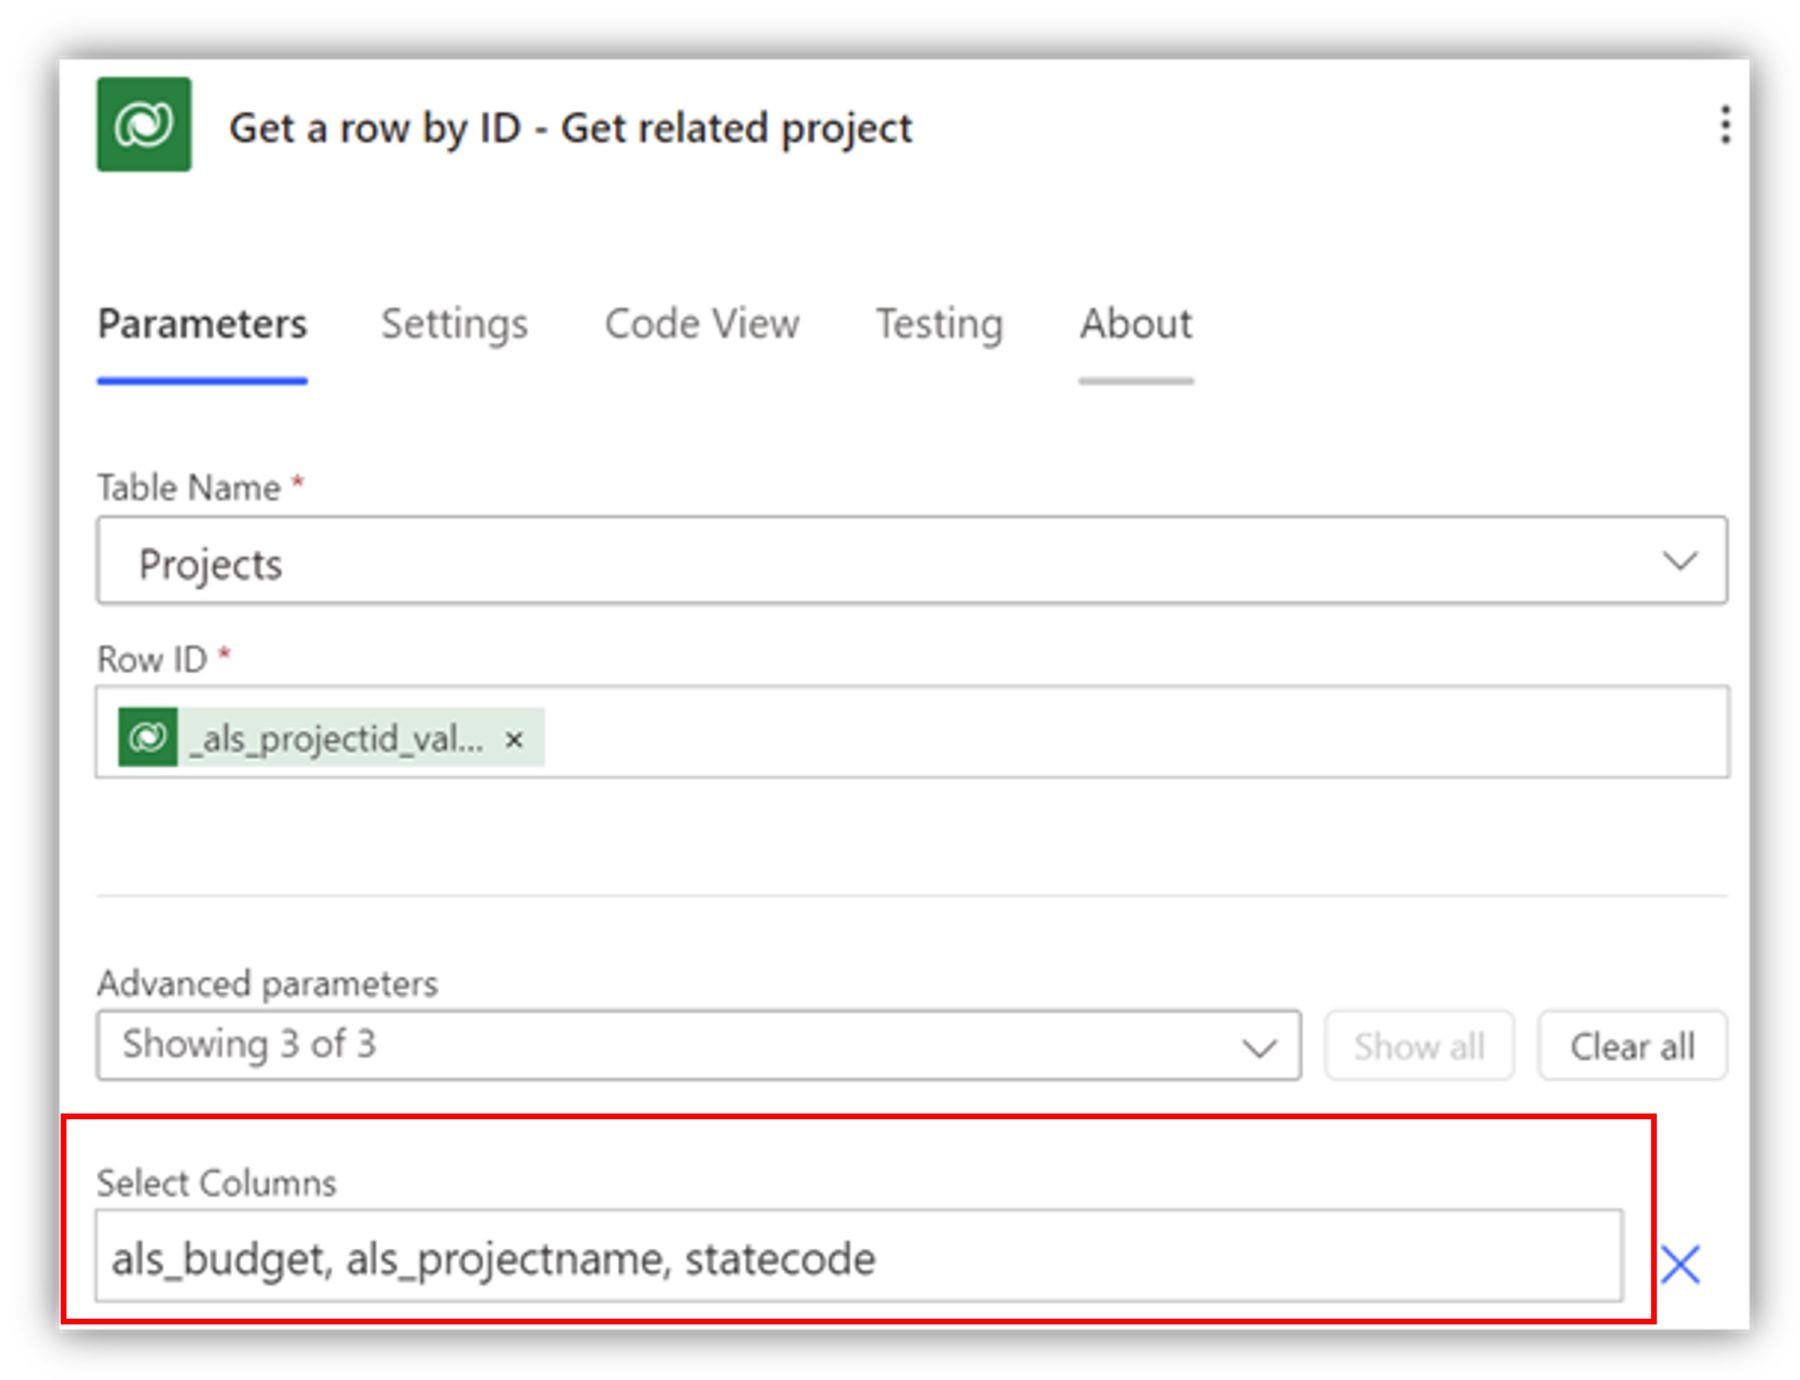
This significantly reduces the amount of dynamic content available and makes your flow more efficient. Note that in my case, I assume Project ID column is not empty, but you should use a condition to check if it is filled or even better, use filter rows in the trigger to ensure the flow doesn’t trigger if the column is empty.
Get row by ID - Expand Query
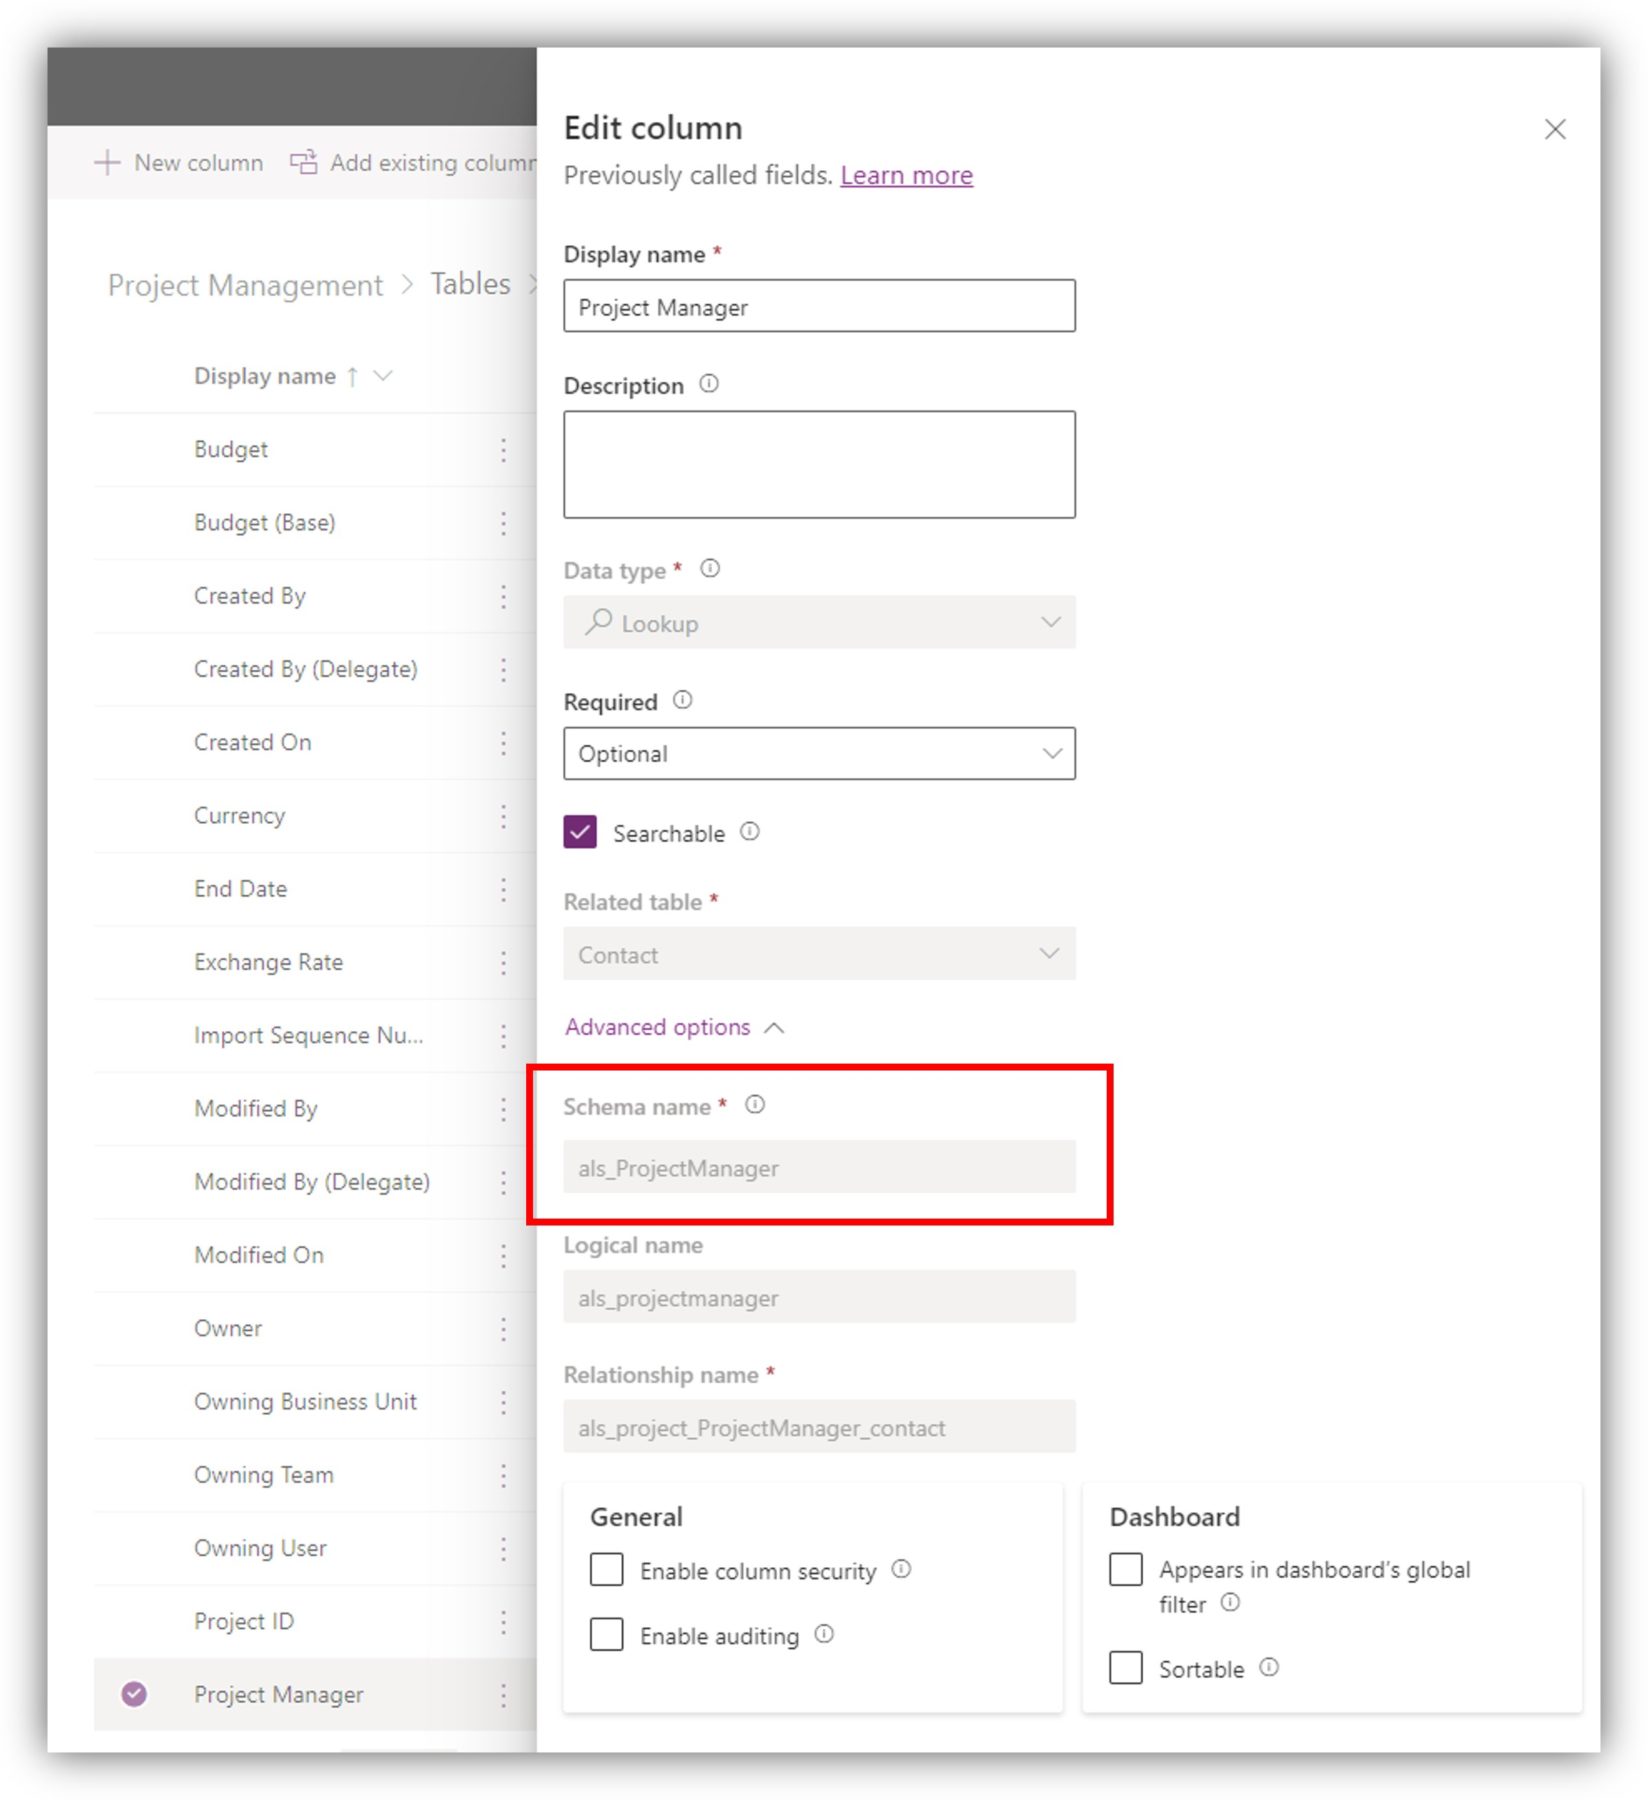
Another great parameter for the Get row by ID action is expand query. You can access information from a related table without requiring a separate action. My Projects table is related to Contacts through a lookup column project manager. I can access information about the project manager by filling in the schema name of the lookup column in expand query. You can find the schema name right above the logical name when you select the column in the table:
If you simply enter the schema name, you get access to ALL of the data of the project manager. However, you can and should make your query more efficient by only selecting the columns you are interested in. Use the format ($select=logicalname1,logicalname2...). For lookup columns, use the special format, as in _parentcustomerid_value:
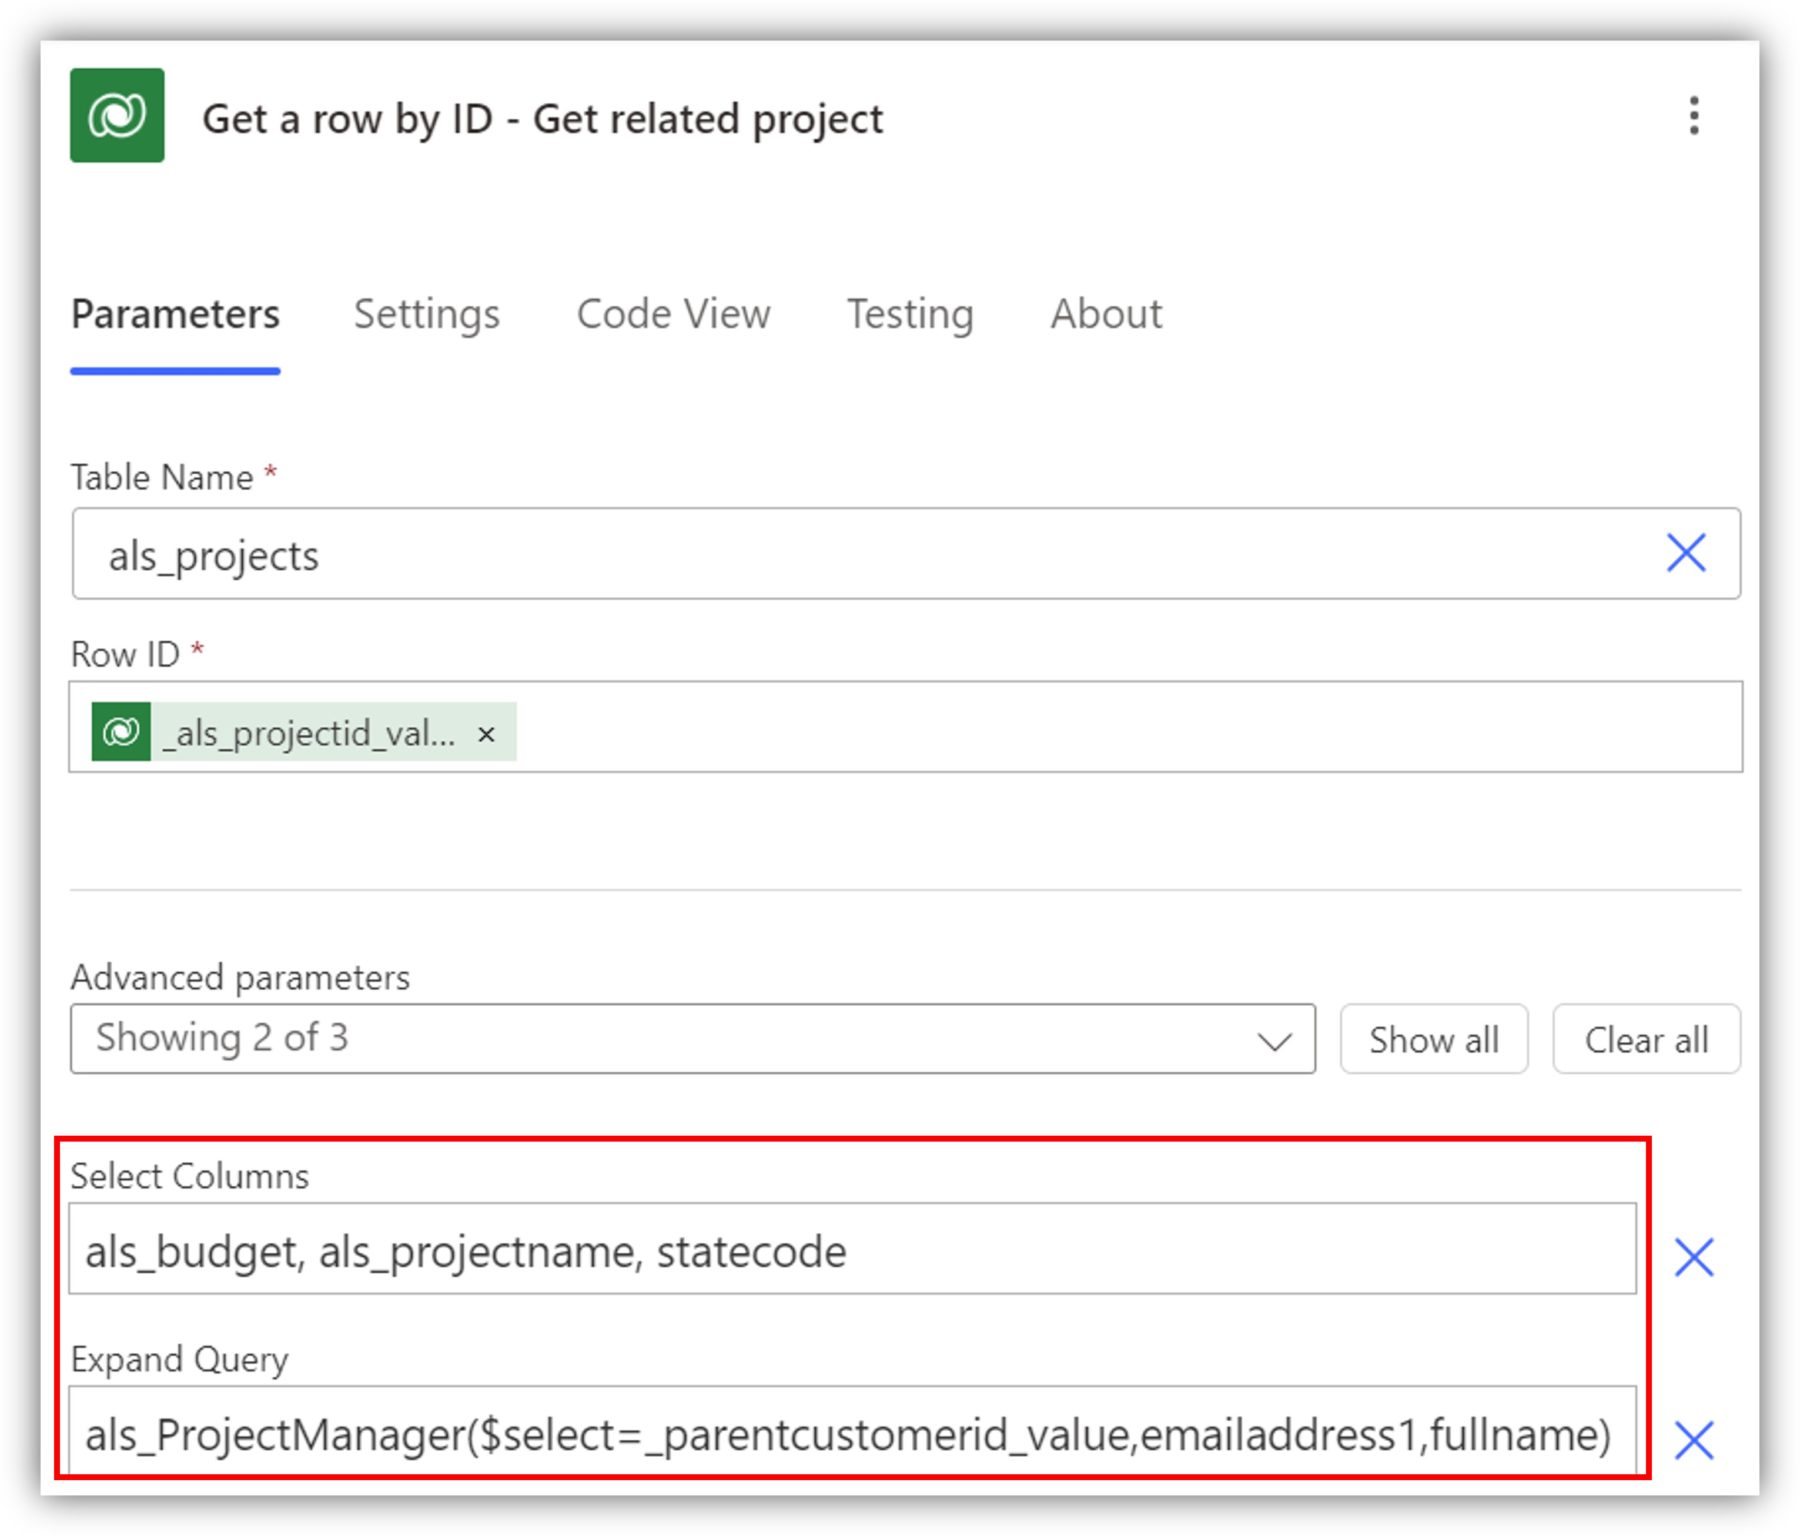
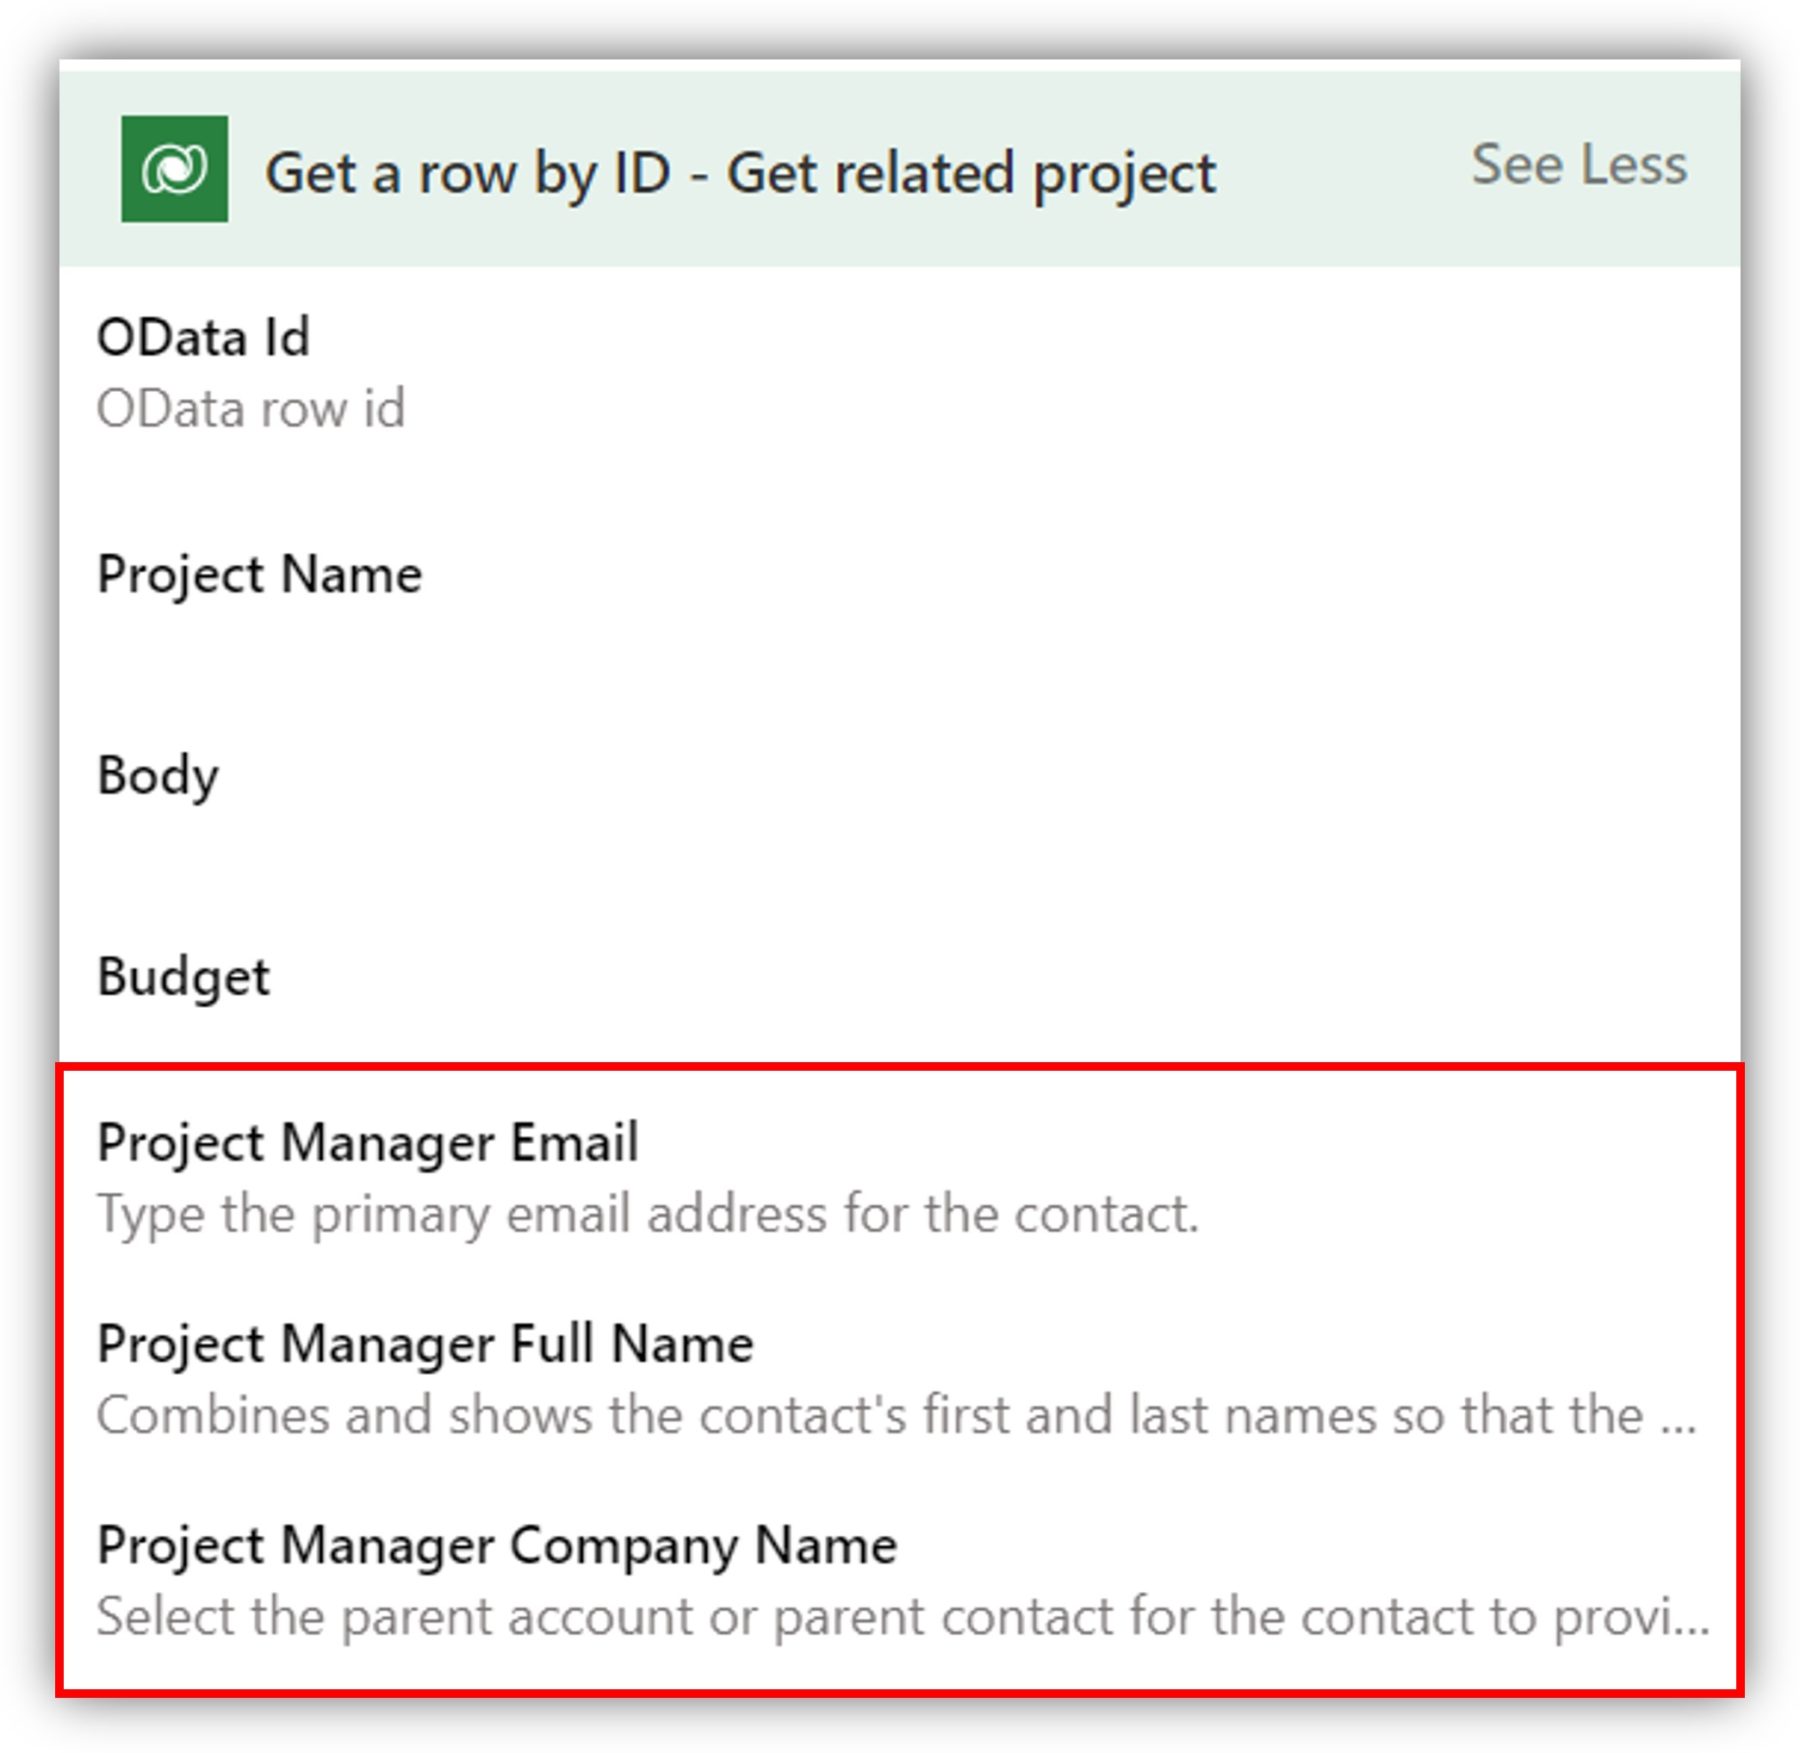
You are not limited to just one lookup column so, if necessary, you can enter multiple. The data appears under the Get row by ID action together with the rest of the dynamic content:
List rows
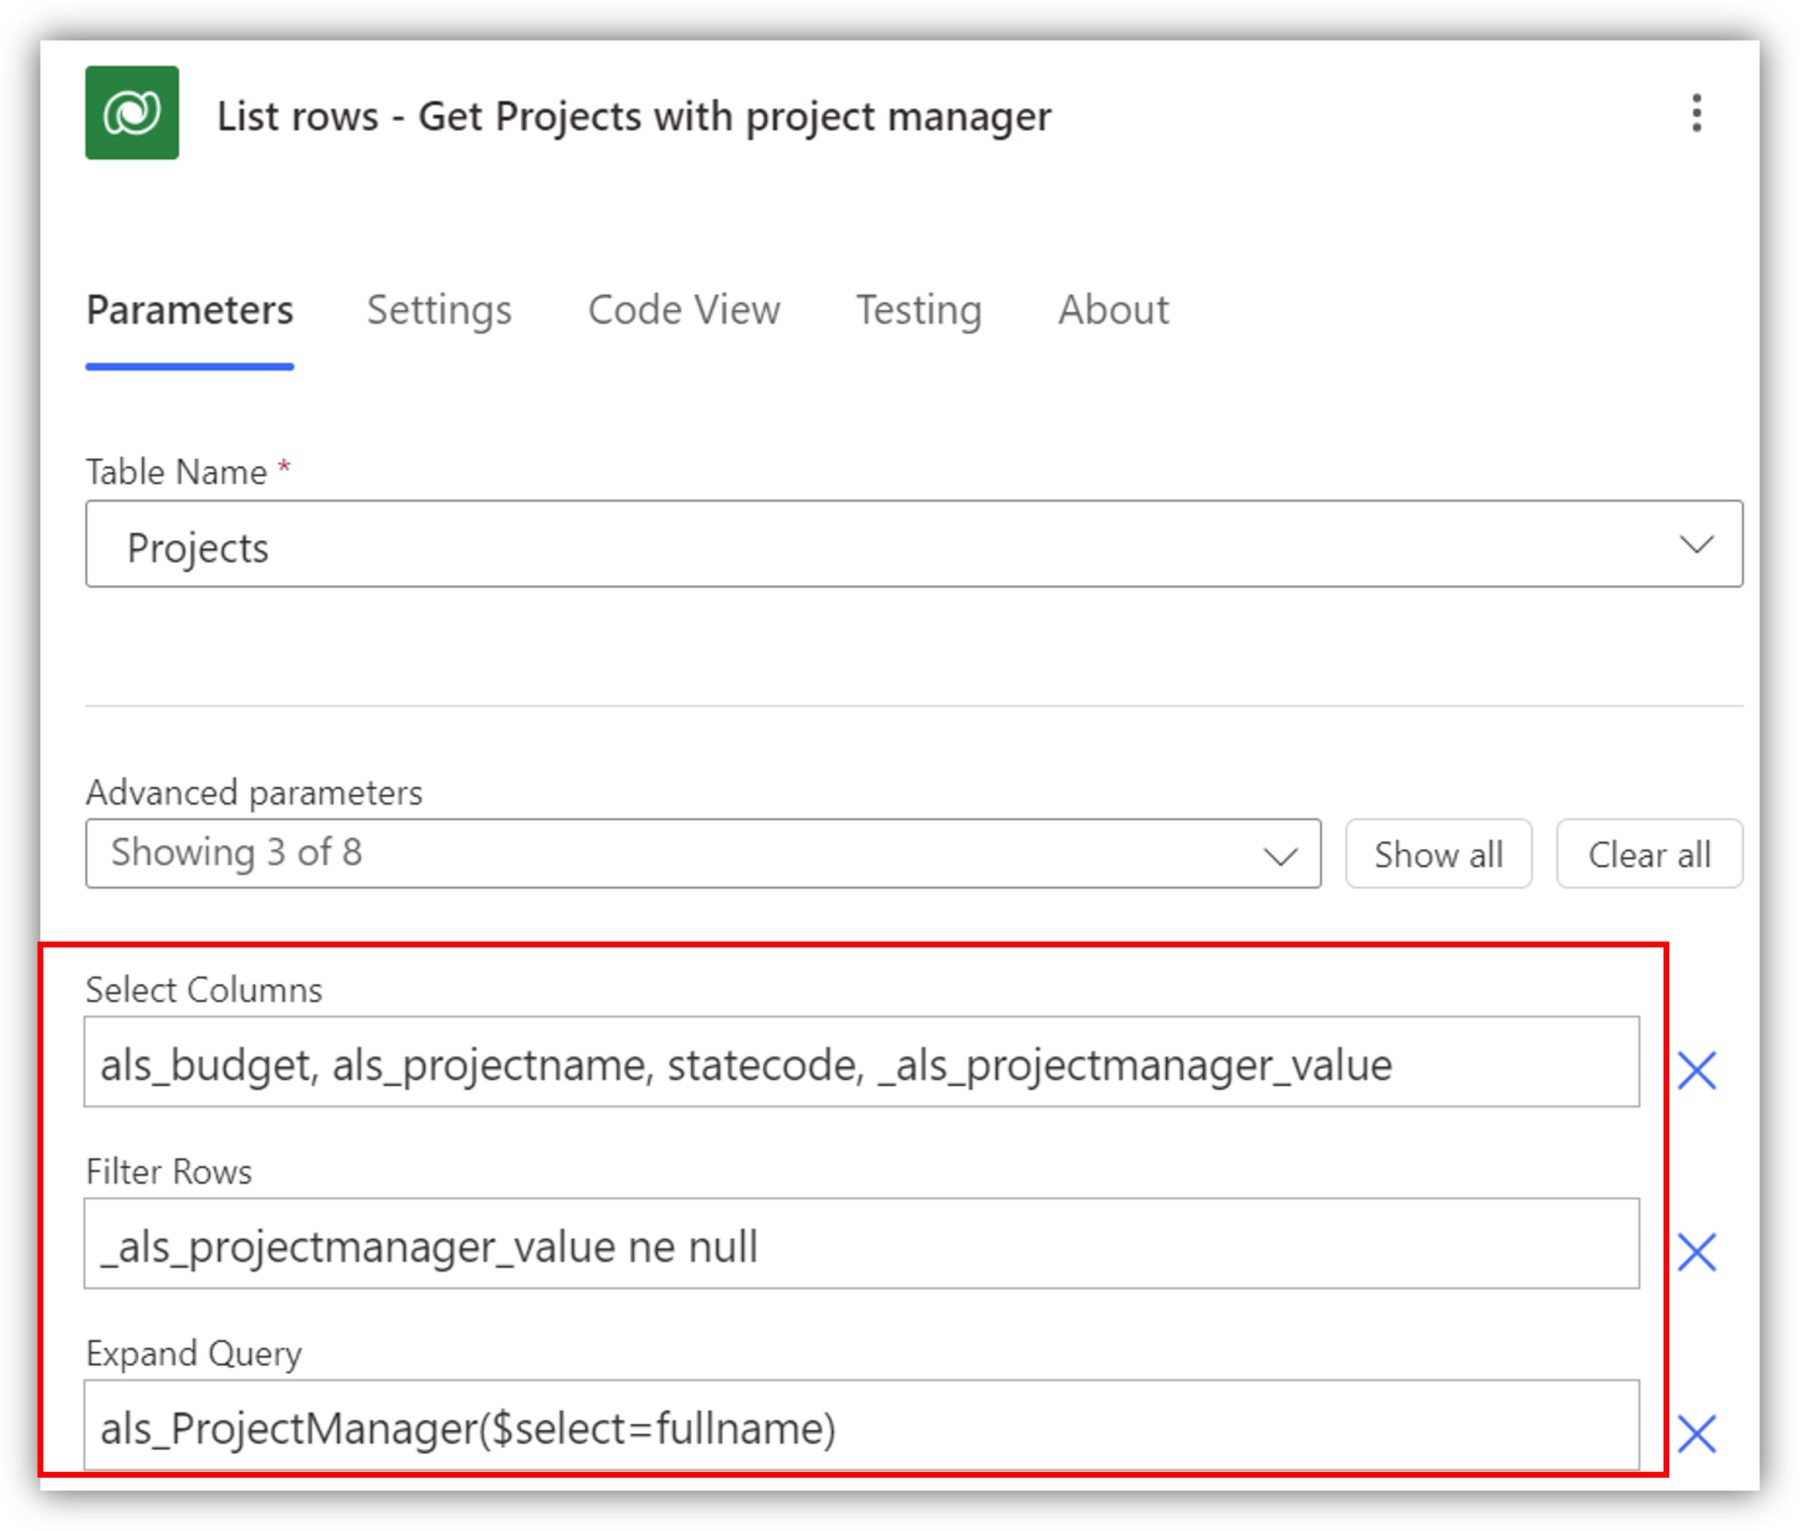
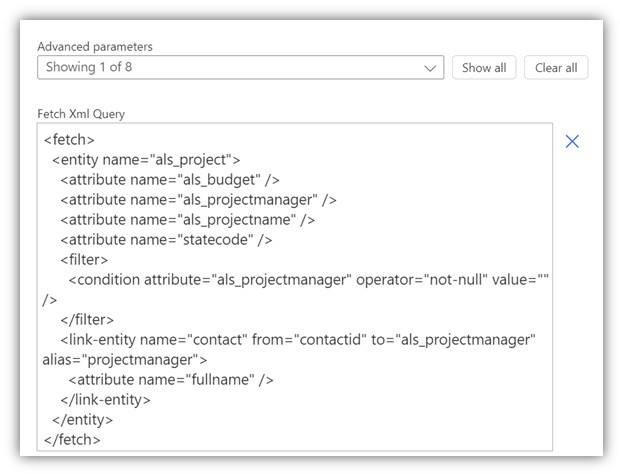
The Get row by ID action assumes you have the GUID available, but sometimes you need to search based on other information instead. This is where List rows comes to play. In the advanced options of that action, there are the familiar parameters select columns, filter rows and expand query to build an efficient search. The following fetches all the records that have a project manager from Projects table. The results are limited using select columns, and the search is expanded to include the full name of the project manager from the related table:
Filter rows is not the only parameter you can use to filter the results. You can use the even more powerful option of Fetch XML to build complex queries. The following Fetch XML query has the same effect as those three parameters above combined:
You can build the query using tools such as FetchXML Builder in XrmToolBox (this is my personal favorite) or Advanced Find straight in Dataverse. Check out Timo Pertilä’s blog on how to use Advanced Find to learn more.
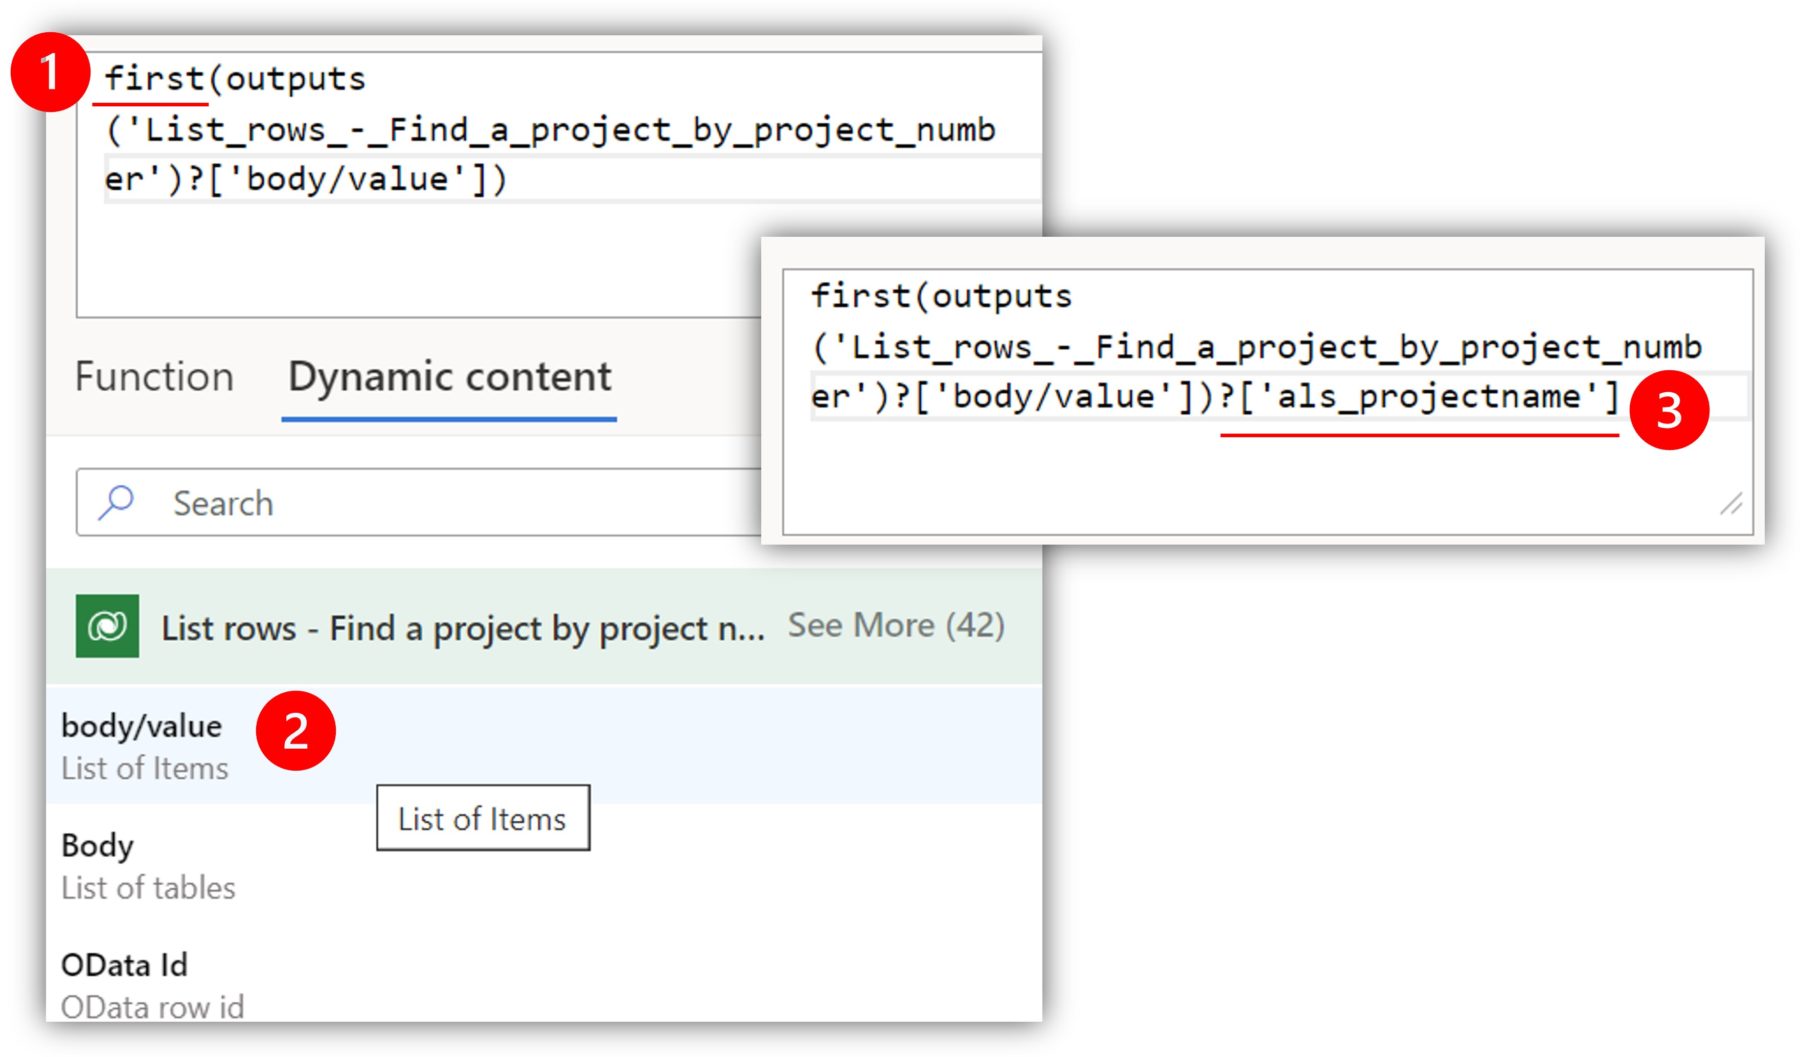
Using List rows, you get multiple records in return. With apply to each, you can perform actions on each record separately, such as updating a column value. Sometimes you only want to find a single record from the database though. I have a project number column (text column) in the Projects table, and it contains a unique project case number for each record. If I want to find a certain record based on that project number, I can use filter rows (or fetch XML):

The only problem here is that even though I am only expecting one record as a result, the flow treats the result as a list and forces an Apply to each loop when I try to use the dynamic content, even if I use row count to limit the result to one record.
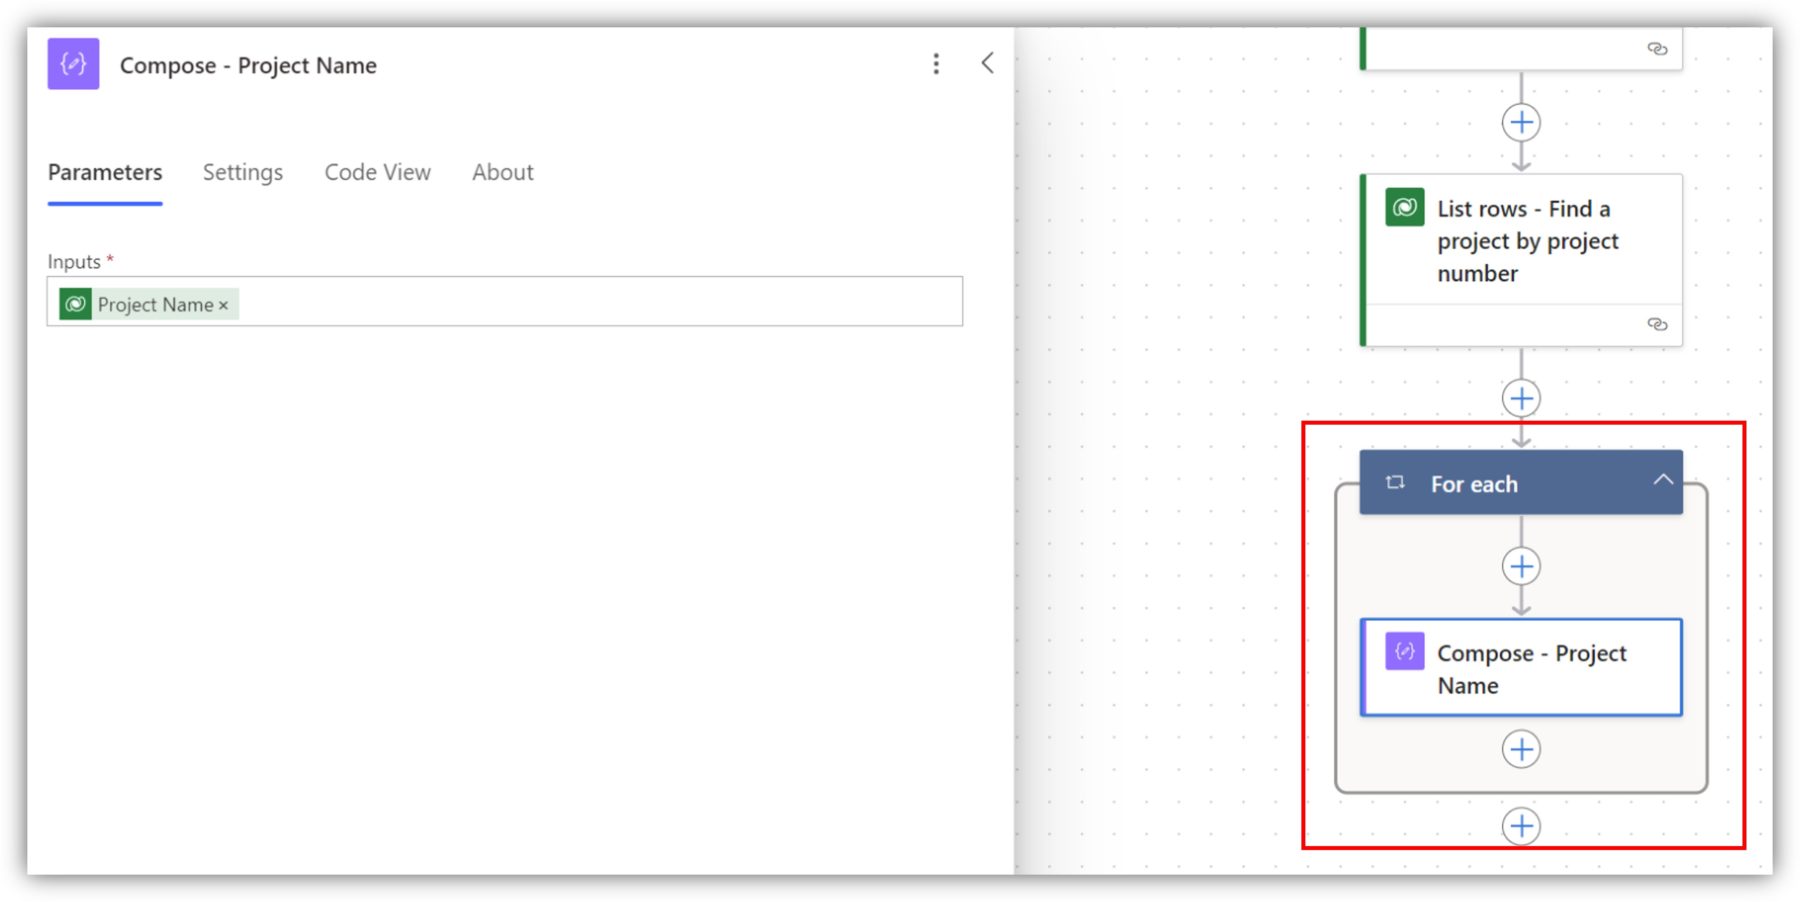
To avoid this, you can use an expression. If I wanted to access the project name in a Compose action, I can use the function first(). For the first parameter of the function, I select body/value from dynamic content, which gives me access to the ”first” record from the result of the list rows action. Then I can enter the logical name of the column I am interested in after a question mark, enclosed in open brackets and single quotation marks.
Using this trick, you get rid of the unnecessary loop.
Add a row / Update a row
Moving on to our last action. Using Power Automate, you will often want to create new records or update existing ones. The actions are similar to each other and I will be using Add a new row as an example. The difference in requirements between these two actions is that you always need to provide values for the required fields for add a new row, whereas for update you can obviously focus on the fields you want to update.
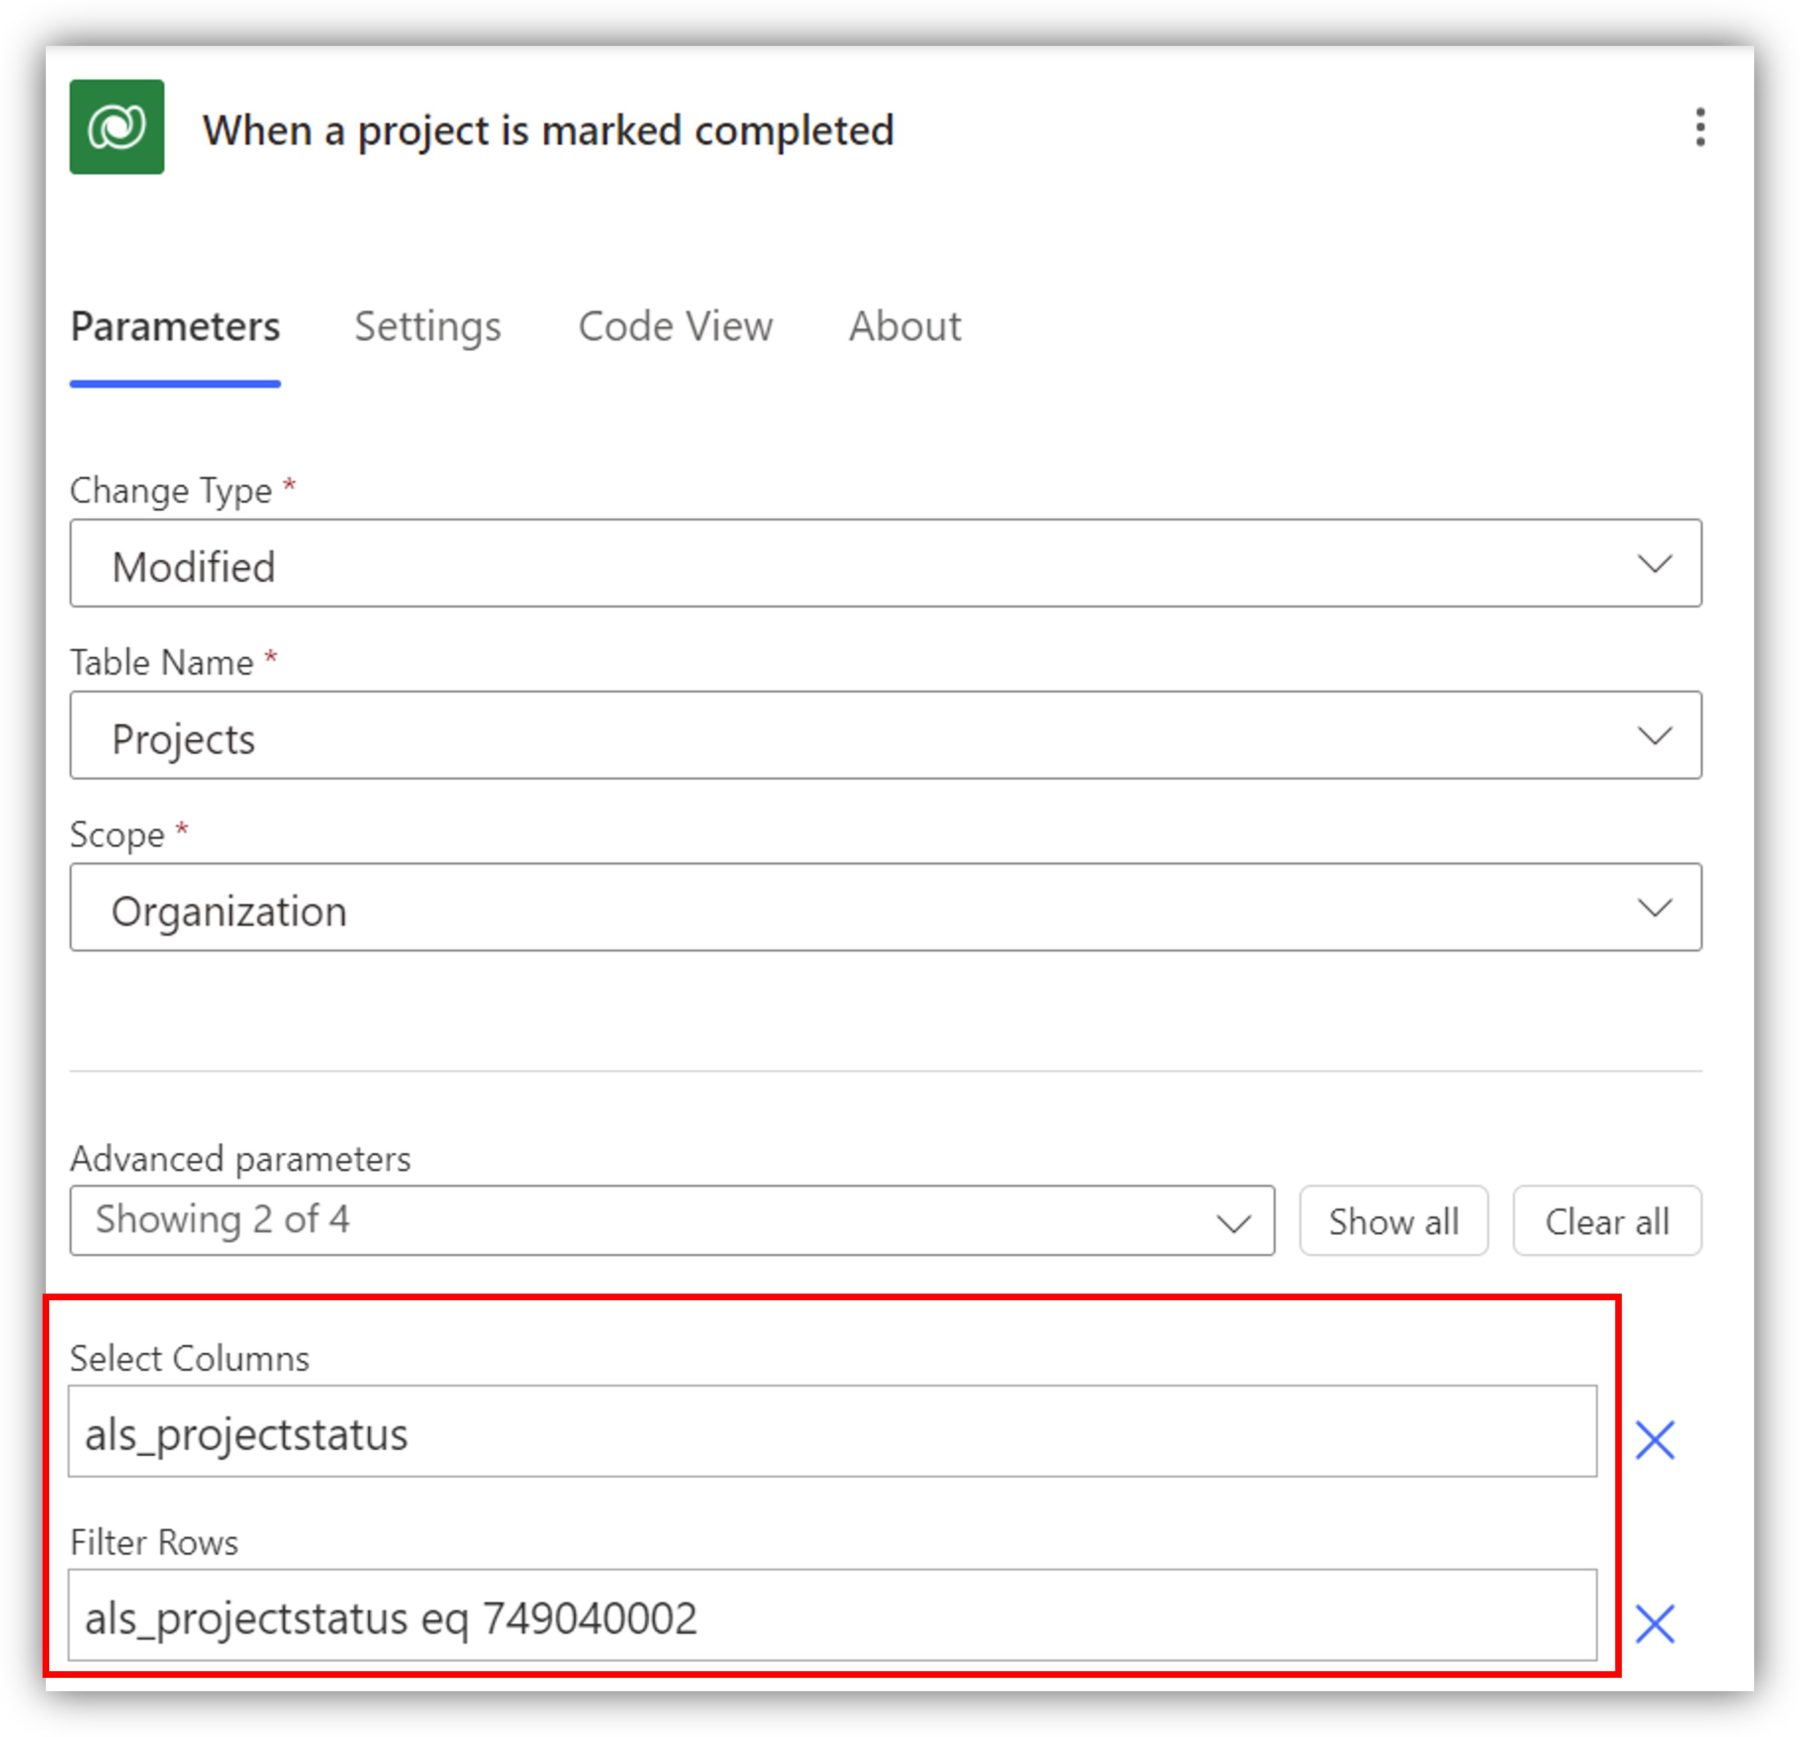
Let’s say that I want to save projects and completed projects in different tables, perhaps to keep data specific to completed projects separate from the rest. I can trigger my flow when the status of the project (choice field) changes to Completed. This corresponds to the numerical value 749040002 you can see below:
Setting values to basic column types
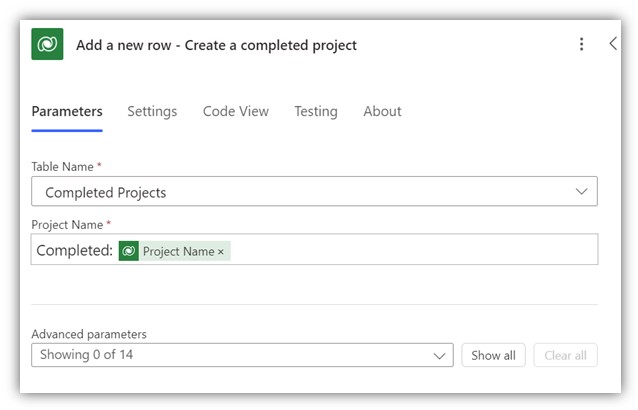
Using the add a new row action, I can create a new completed project. In this simple example, I am creating a new record by filling in the name column, which is the only required column for the table. I am using the original project’s name prefixed with “Compeleted: ”, so the names are clearly separate from each other:
I can set values to the rest of the fields under advanced parameters. Let’s say I wanted to copy the matching fields from the original project. For simple columns such as text and datetime columns, I can simply select the value from dynamic content:
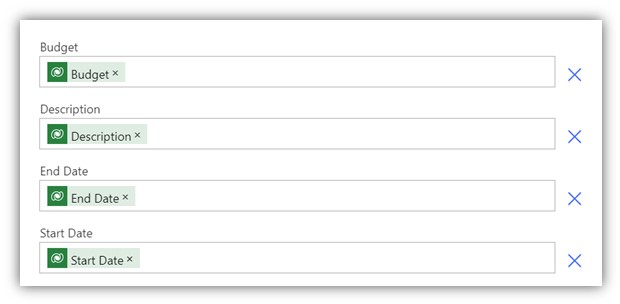
If I were to enter the datetime values manually, they need to be entered in ISO 8601 format, which means you might need to use functions such as formatDateTime(). Numbers and text do not require any special formatting.
Setting values to choice columns
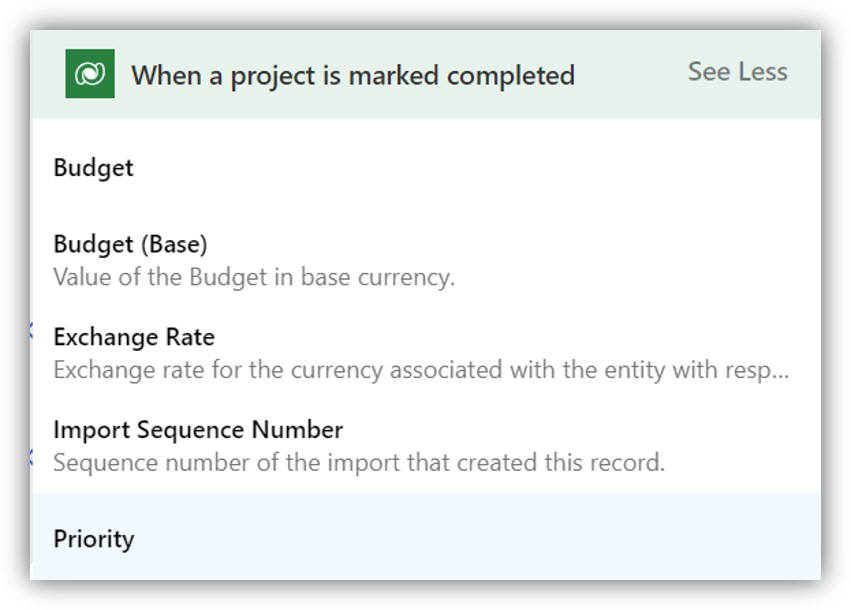
When you set a value to a choice column, you can either select a value from the list or select Enter custom value. Since we want the priority here to come from the original project, we select the latter.
To enter a custom value, we need to know the numerical value of the choice field. Since both tables are using the same global choice column, the values are synced, and we can get the correct one from dynamic content:
If for some reason your choice values are not in sync or perhaps you are getting data from an outside source in text format and you need to map them to the numerical values in Dataverse, you can build an expression using the if() function.
Setting values to lookup columns
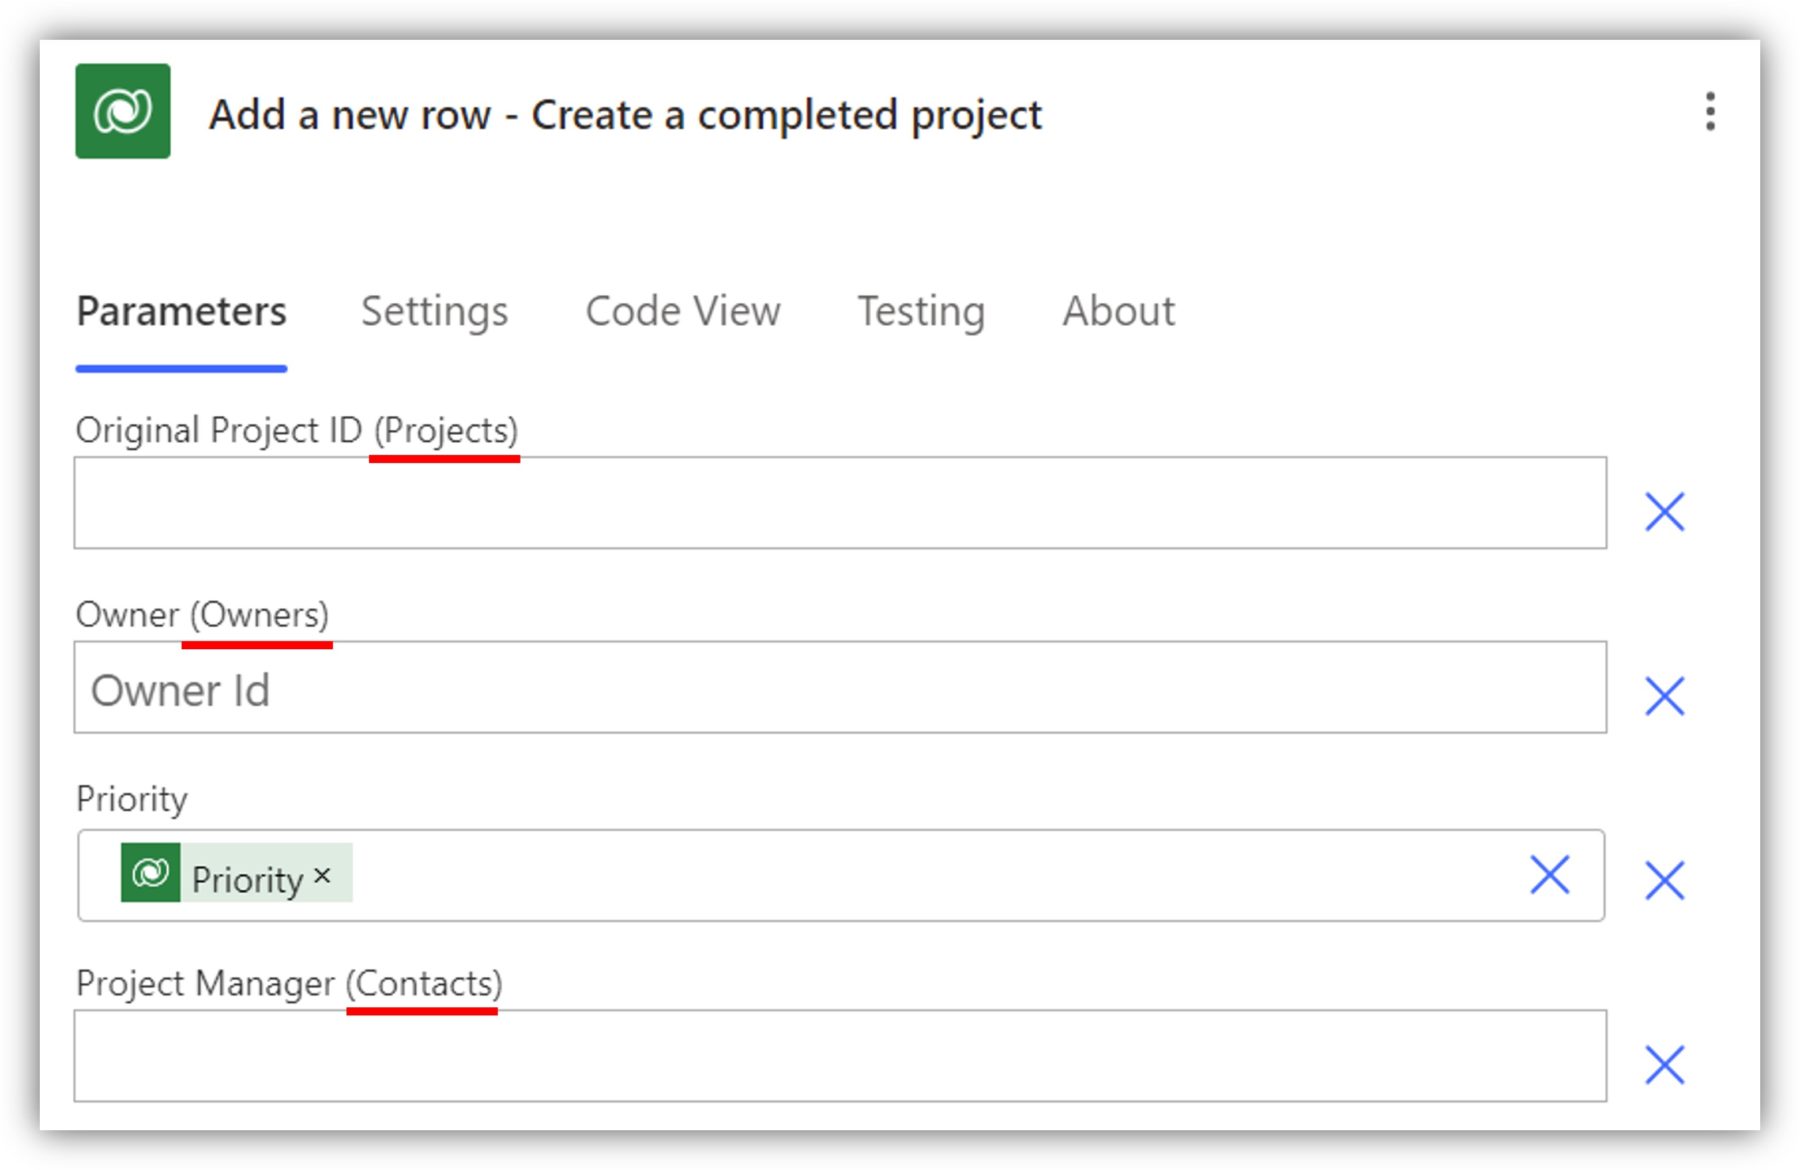
Finally, let’s learn how to set a value to a lookup column. You can recognize a lookup column in the add a new row action by the table name in parentheses:
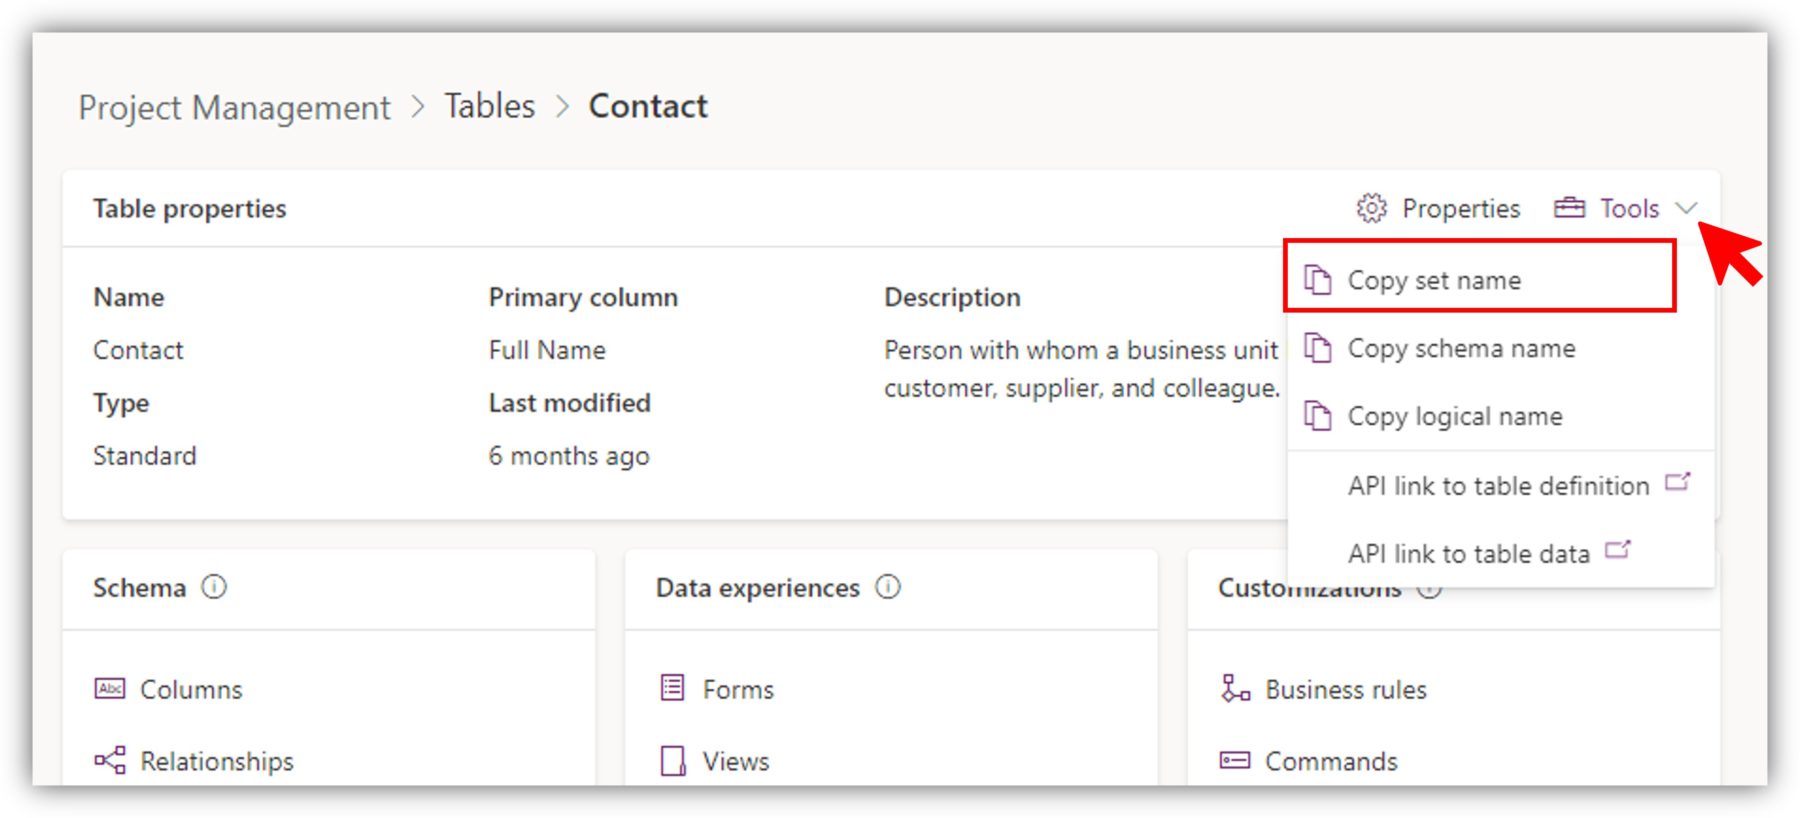
To set a value to a lookup column, you first have to find out the entity set name of the table. (Not completely sure why Dataverse loves having all these different name varieties for columns and tables.) You can access the entity set name by going to the table, selecting Tools in the properties and clicking on Copy set name:
There are other ways to access the entity set name as well - find your favorite following this tutorial by Linn Zaw Win.
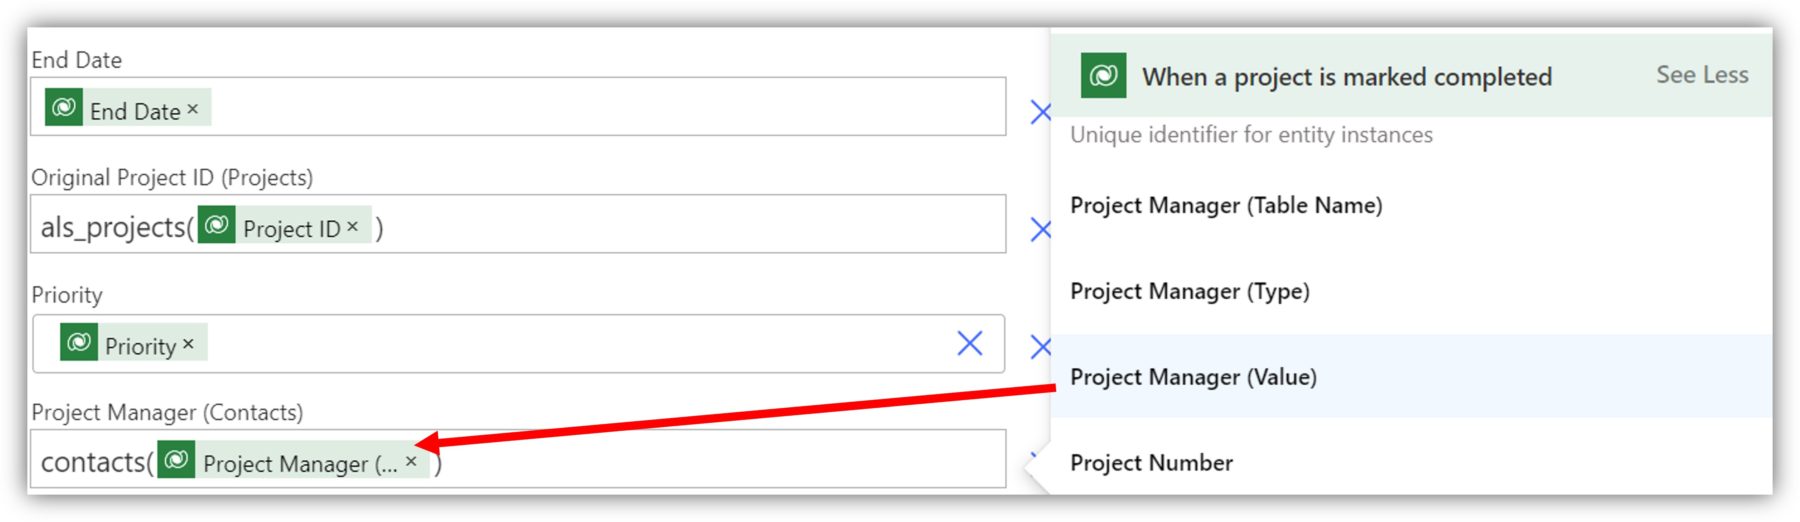
Once you have the entity set name, copy and paste it to the lookup field, enter parentheses and enclosed, select the GUID of the lookup column from the dynamic content. In the following example, I am setting a value to the project manager column:
I am assuming here that the project manager value is never empty. If the GUID turns out to be blank, the action will fail. If this is a possibility, use an expression to set the value to null for empty values. For example, this expression sets the project manager column value to null if the GUID is empty:
if(empty(triggerBody()?['_als_projectmanager_value']),null,concat('contacts(',triggerBody()?['_als_projectmanager_value'],')'))
I use the function empty() to check if there is a value and concat() to build the expression consisting of the entity set name, parentheses, and the GUID.
That’s it for this tutorial! You should now be comfortable with using some of the most common Dataverse actions in Power Automate and be ready to explore more. Stay tuned for more Power Platform content.

Liked this post? Follow Bofor on LinkedIn to get the latest updates.
Contact us to learn more about Bofor and what we can do for you.